SVG animations bring a dynamic and engaging element to your website, but managing them programmatically can be challenging. This is where an SvgatorPlayerSdk comes in, making it easier to control SVGator animations with features like segmented playback and random transitions.
Read documentation on SVGator’s Player JS API:
What is an SvgatorPlayerSdk?
An SVGator JS Player Sdk is a JavaScript class designed to provide enhanced control over SVGator animations embedded in your web pages through SVGator Player JS API.
Let's take the following example:
The given animation:
- loops the default state until the first user interaction;
- on mouse over - it loops the first 20% infinitely;
- on click - it jumps to a random sub-animation (at 20%, 40%, 60% or 80%);
- once finished, it restarts looping the first sub-animation (0% - 20%).
This SvgatorPlayerSdk is a JavaScript class designed to provide enhanced control over SVGator animations embedded in your web pages. It will allow you to:
- Create Multi-State Animations: to layer the interactivity of the animations, have sub-animations respond to different events and user actions, etc.
- Segment Animations: Divide your SVG animation into sections and control playback for each segment
- Trigger Random Transitions: Introduce variety by randomly switching between animation segments
- Control Playback via Events: Start and trigger transitions based on user interactions like clicks or page loads
Getting Started - Implement The Tag
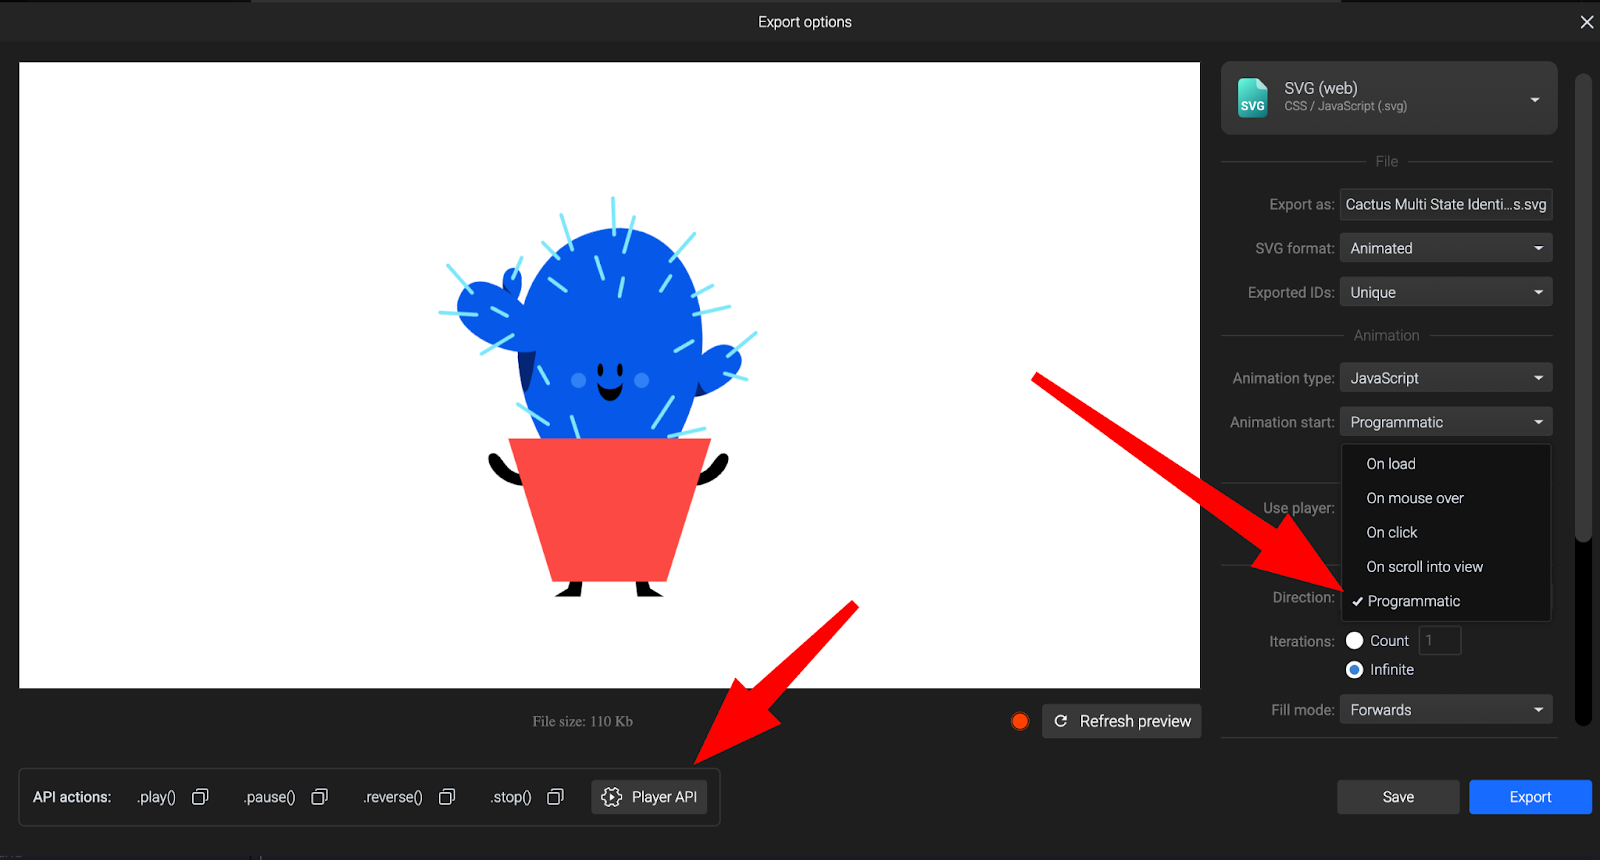
Before diving into the code, make sure you have exported your SVG with Animation Start set to the Programmatic option.
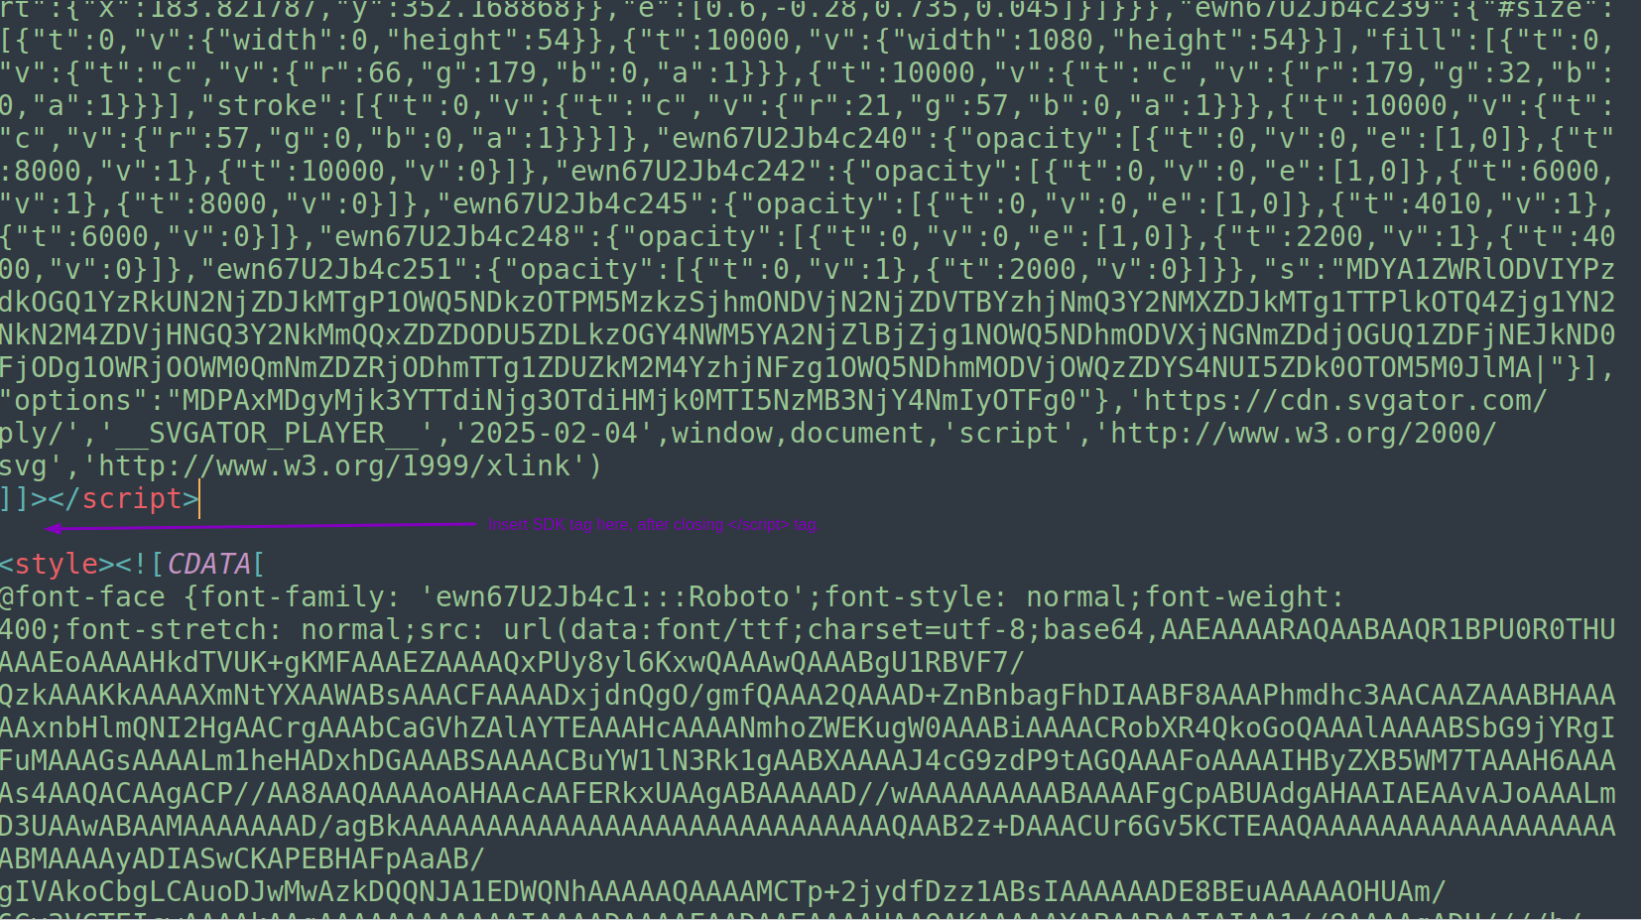
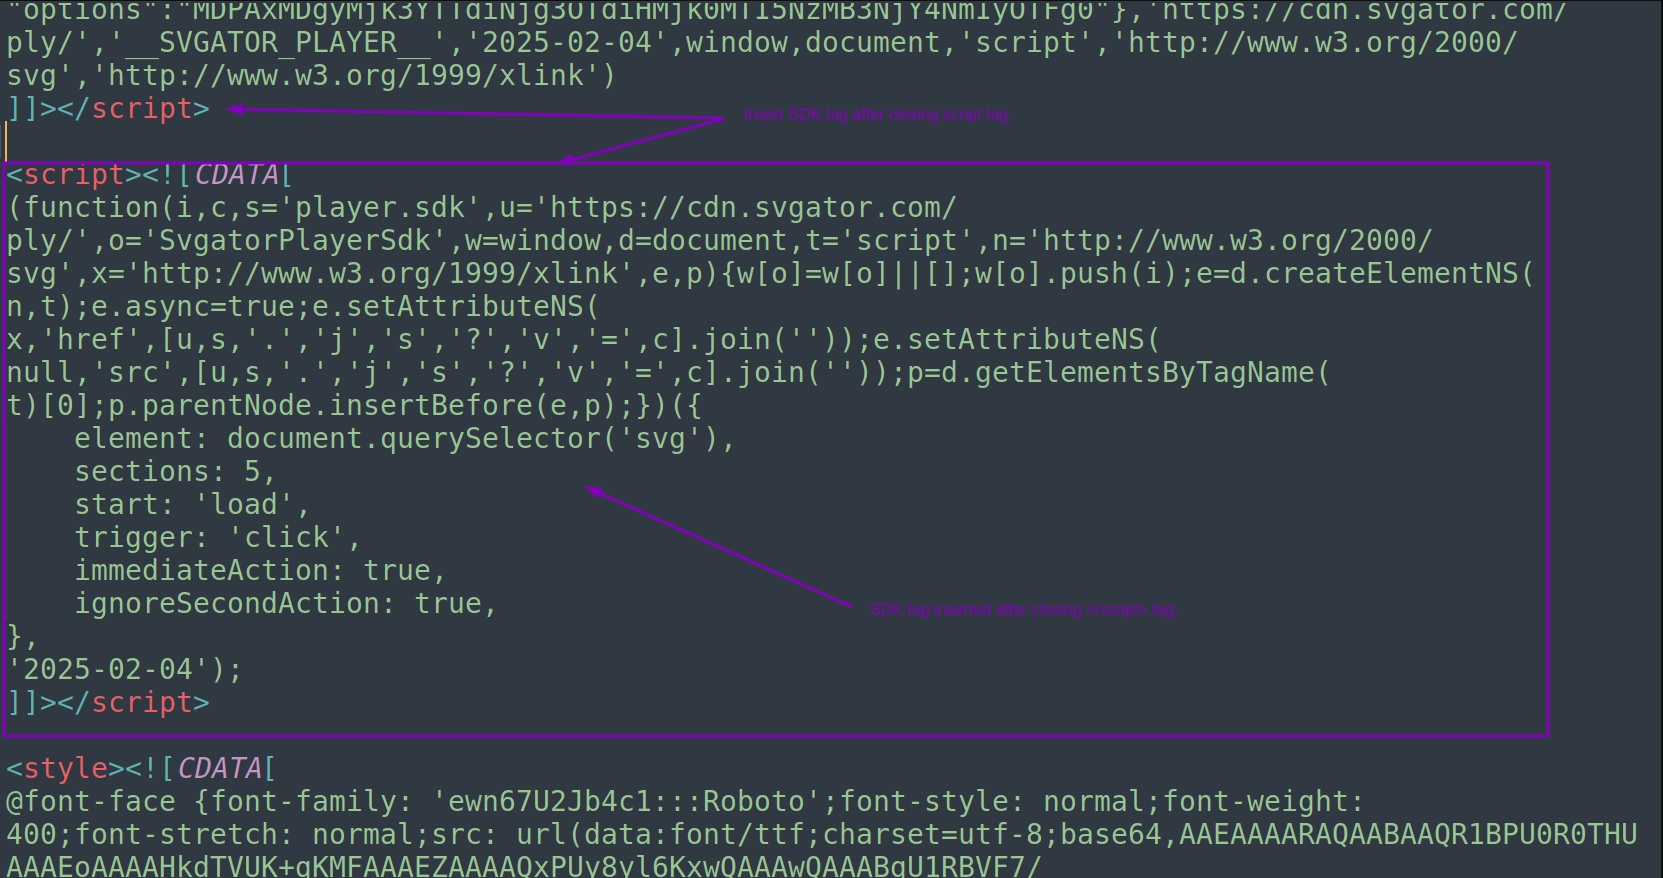
<script><![CDATA[
(function(i,c,s='player.sdk',u='https://cdn.svgator.com/ply/',o='SvgatorPlayerSdk',w=window,d=document,t='script',n='http://www.w3.org/2000/svg',x='http://www.w3.org/1999/xlink',e,p){w[o]=w[o]||[];w[o].push(i);e=d.createElementNS(n,t);e.async=true;e.setAttributeNS(x,'href',[u,s,'.','j','s','?','v','=',c].join(''));e.setAttributeNS(null,'src',[u,s,'.','j','s','?','v','=',c].join(''));p=d.getElementsByTagName(t)[0];p.parentNode.insertBefore(e,p);})({
    element: document.querySelector('svg'),
    sections: 5,
    start: 'load',
    trigger: 'click',
    immediateAction: true,
    ignoreSecondAction: true,
},
'2025-02-04');
]]></script>
Paste the given code from above, right after the </script> closing tag in the exported SVG file.
Once added it should look like in the example below:
SvgatorPlayerSdk - Settings To Pass
| Property | Type | Sample Value | Description |
|---|---|---|---|
element |
HTMLElement|string | '#eOFpzJqyd1g1' |
Specifies the SVG exported from SVGator; either a direct reference to HTML DOM node or a CSS selector given as string. |
sections |
number | 1 |
the number sections of subanimations (of equal length) |
start |
string | 'load' | 'click' | 'mouseover' |
specifies the event the animation should start on |
trigger |
string | 'load' | 'click' | 'mouseover' |
specifies the event the subanimations should change on |
immediateAction |
boolean | false | true |
if false to false current subanimation will finishes first, having the animation jumping to the next random subanimation only after the current one has finished |
ignoreSecondAction |
boolean | true | false |
if set to true and there is a current subanimation runnning other than the first one, further triggers will be ignored |
Note: the given example will find the first SVG element on the page. If you want to use more SVG files, pass the a CSS selector (i.e. '#' + the ID of your SVG animation) or the DOM element itself.
How it Works
The animation projects needs to be organized first:
- Organize your project into n equal parts (i.e. 0s→2s, 2s→4s, 4s→6s, 6s→8s, 8s→10s);
- Have the first section be the one you want to loop infinitely;
- Follow it with the sections of animation that will be randomly jumped to;
- It's important to have the very same frame at the beginning of each section (0s, 2s, 4s, etc).
This SvgatorPlayerSdk divides your animation into equal sections based on the sections parameter. It then listens for events specified by start and trigger.
When the start event occurs, the animation begins playing. When the trigger event occurs, and the animation is in the first section, the SDK switches to a random animation segment after current segment finishes.
The animation will also restart at the beginning when it reaches the end of its current section, unless a random animation is triggered.
Example Scenario
Imagine you have an SVG animation of a character performing different actions. You can use an SvgatorPlayerSdk to:
- Divide the animation into sections, each representing a different action
- Start the animation when the start trigger has occurred
- Randomly switch to a different action when the change trigger has occurred
Benefits
- Enhanced Interactivity: Provides a simple way to add interactive elements to your SVG animations.
- Dynamic Content: Allows for dynamic and unpredictable animation playback.
- Improved User Experience: Creates a more engaging and interactive user experience.
- Increased Customization: Offers flexibility in tailoring animations based on user actions and interactions, allowing for unique and personalized experiences.
- Seamless Integration: Facilitates easy integration of interactive animations into web projects, enhancing the overall functionality without complicating the codebase.
Conclusion
SvgatorPlayerSdk is an essential tool for developers looking to enhance their SVGator animations. With features like segmented playback and random transitions, it simplifies the creation of interactive and engaging web experiences.
Be sure to customize the settings and event triggers to match your animation and user interaction needs. Happy coding!