Advanced Morph Animation Tutorial
Duration: 28:19
In this tutorial, we will take morphing animation to the next level. You will learn how to change the nodes' position for a more realistic effect.
You will find a written version of this tutorial below.
I will show you how I've used the Morph animator for a more complex scene, where I've animated this robot interacting with an icon which changes its shape with each interaction.
I'm gonna start with the robot head animation. I want to create an illusion of a 3D rotation with the help of the Morph animator. I have to animate each element here to make the head turn a little like it's looking at us. Let's start with this first element and add the Morph animator. Press Shift+M on your keyboard and the first morph keyframe will be added on the timeline. Now we're gonna work with the Node tool:
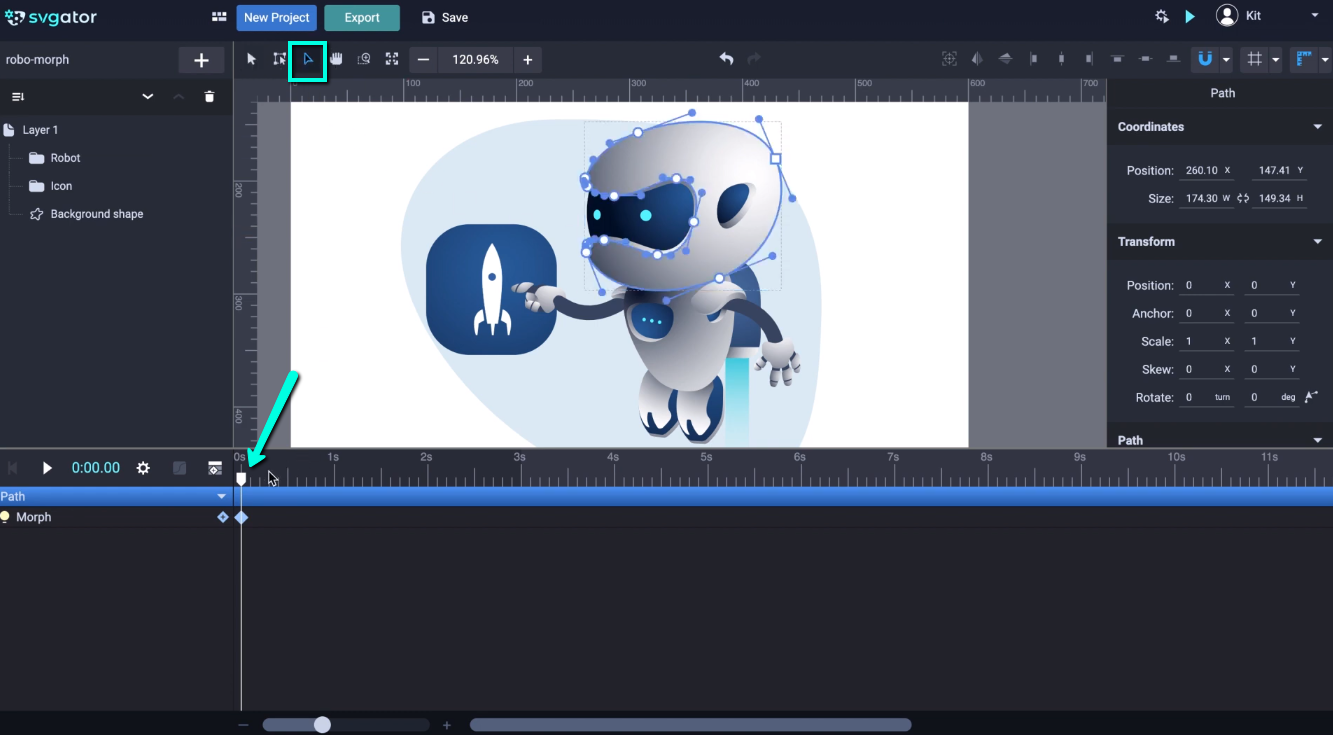
Let's drag the play head to half a second. Little zoom in, hold down ctrl or cmd for Mac users, and click to select multiple nodes and drag them to the right a little bit:
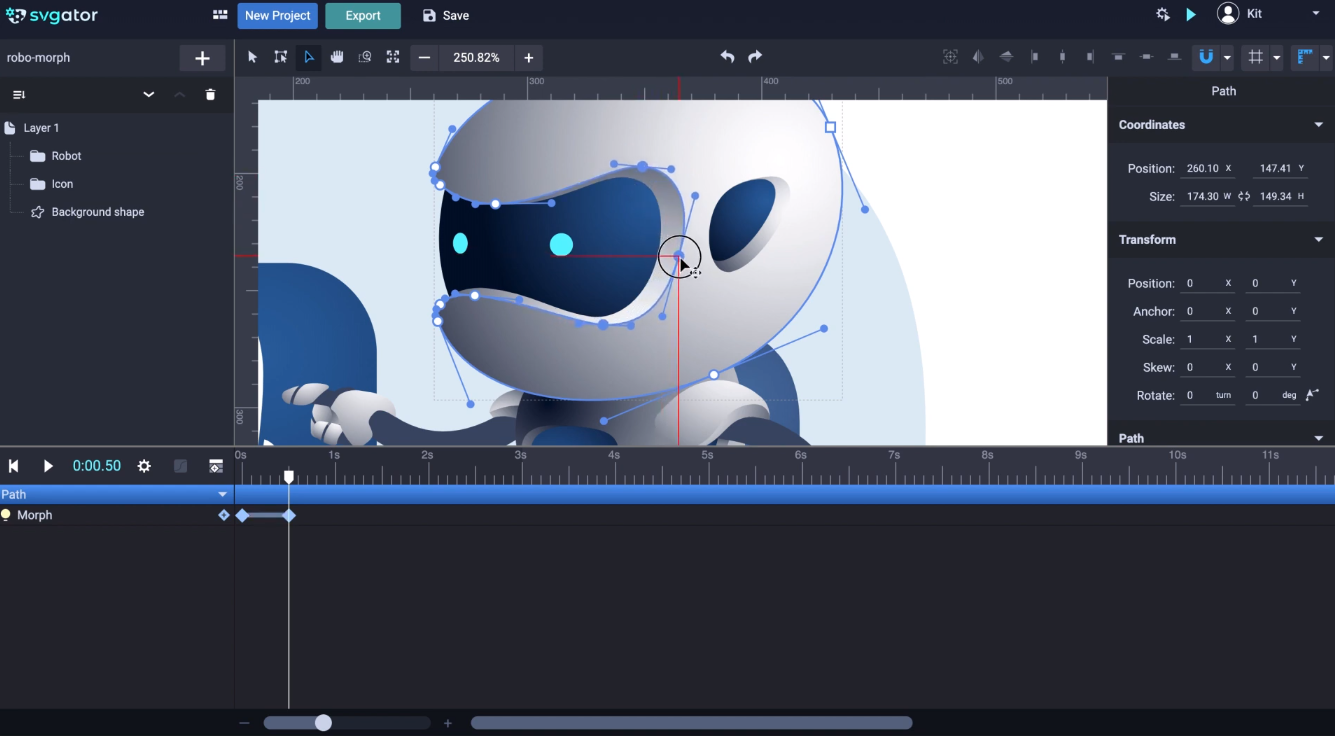
Let me disable the snapping for now. That makes it easier to reposition these points. This is maybe the most meticulous part of the whole project. Let me lock that element by clicking here. Now let's bring these 2 points a little to the right as well. And we'll do the same with these down here. Place them carefully, you don't want to drag them too much. Zoom out a little and move the points on the back of the head:
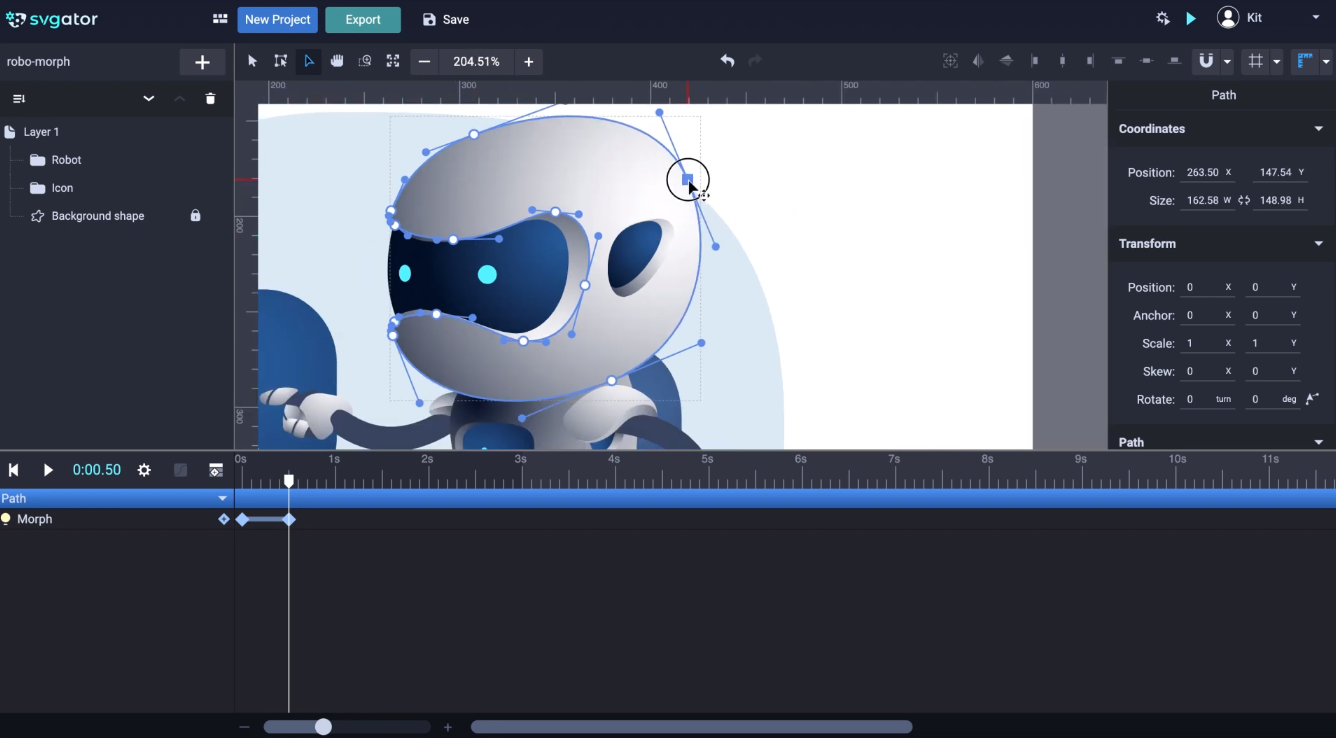
I'm trying to change the perspective and create an illusion that the head is rotating a little in the 3D space, cool.
Let's continue with the next element, the one below. Jump back to 0 and press Shift+M to add the Morph Animator. Then drag the play head to the 0.5-second mark. And I'm going to do the same with the points, trying to figure out how it should look with the head turn and reposition the points accordingly:
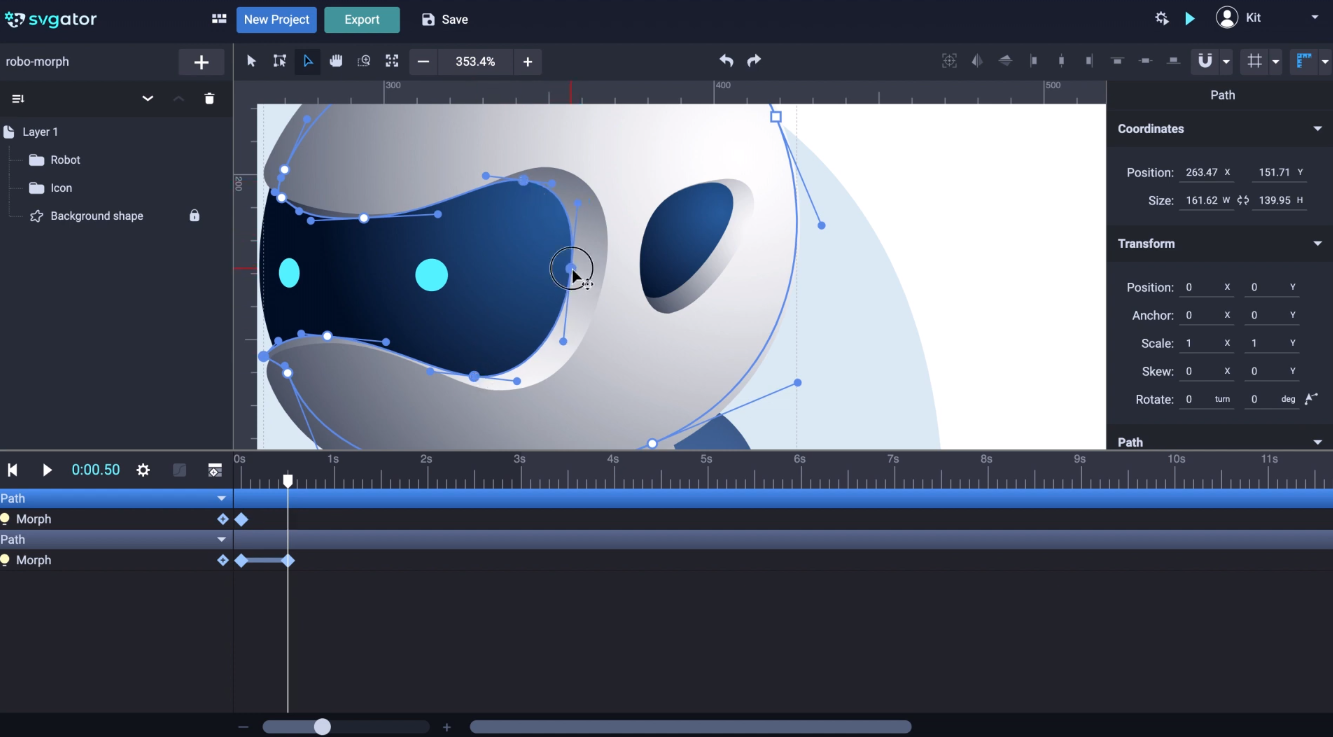
I also have to adjust the curves at some points and even make some readjustments for the previous ones. For the sake of time, I'm gonna fast-forward the video while I'm dealing with the points of this element. Ok, that looks good enough. Now as I said this is the most meticulous part and the more time you spend on it, the better end result will be.
Now let's move onto this blue shape. Add the Morph animator with the play head at the beginning of the timeline. And at 0.5 seconds start moving its points to their new position. It's a good idea to check on the animation after every repositioning:
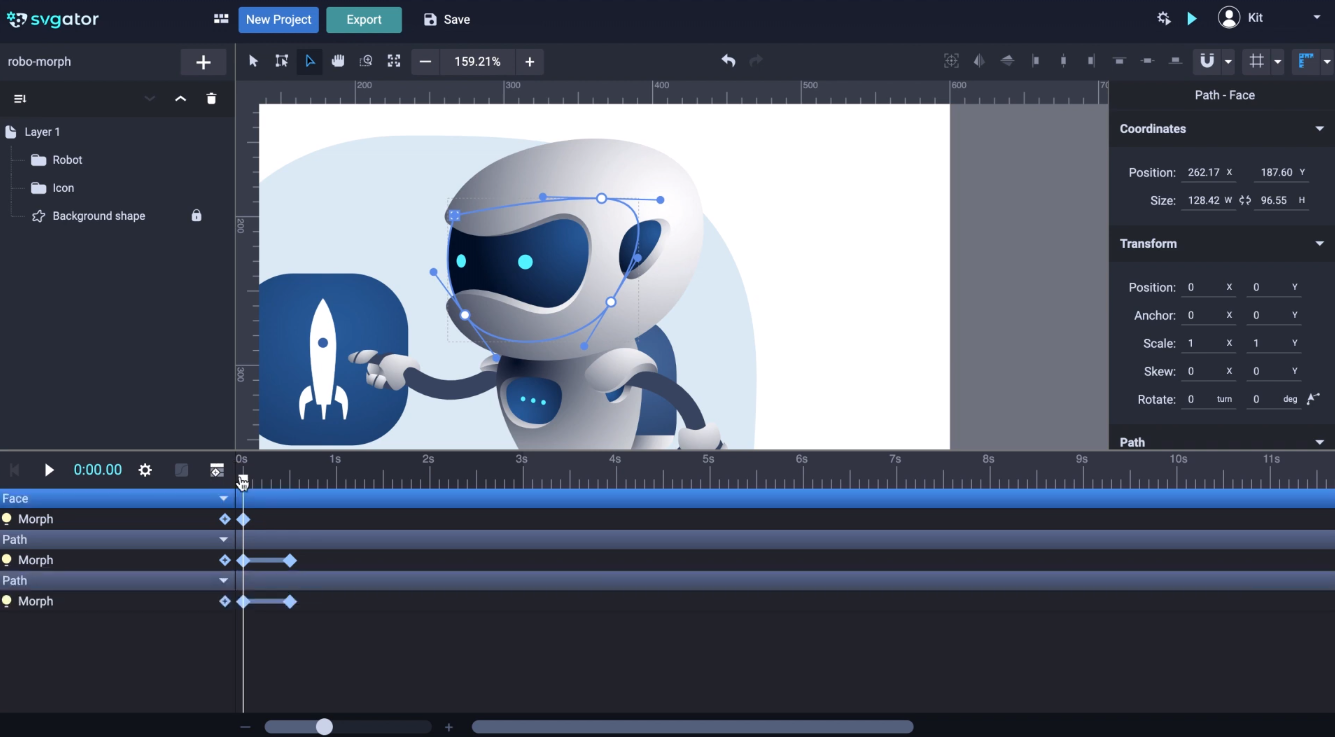
Alright so now I'm going to animate the eyes. We're gonna find the group with the eyes, here. Or we can click on one of the eyes if you get lost on the elements list. There we go, here it is. Choose the Transform tool, and center the origin for the eyes group:
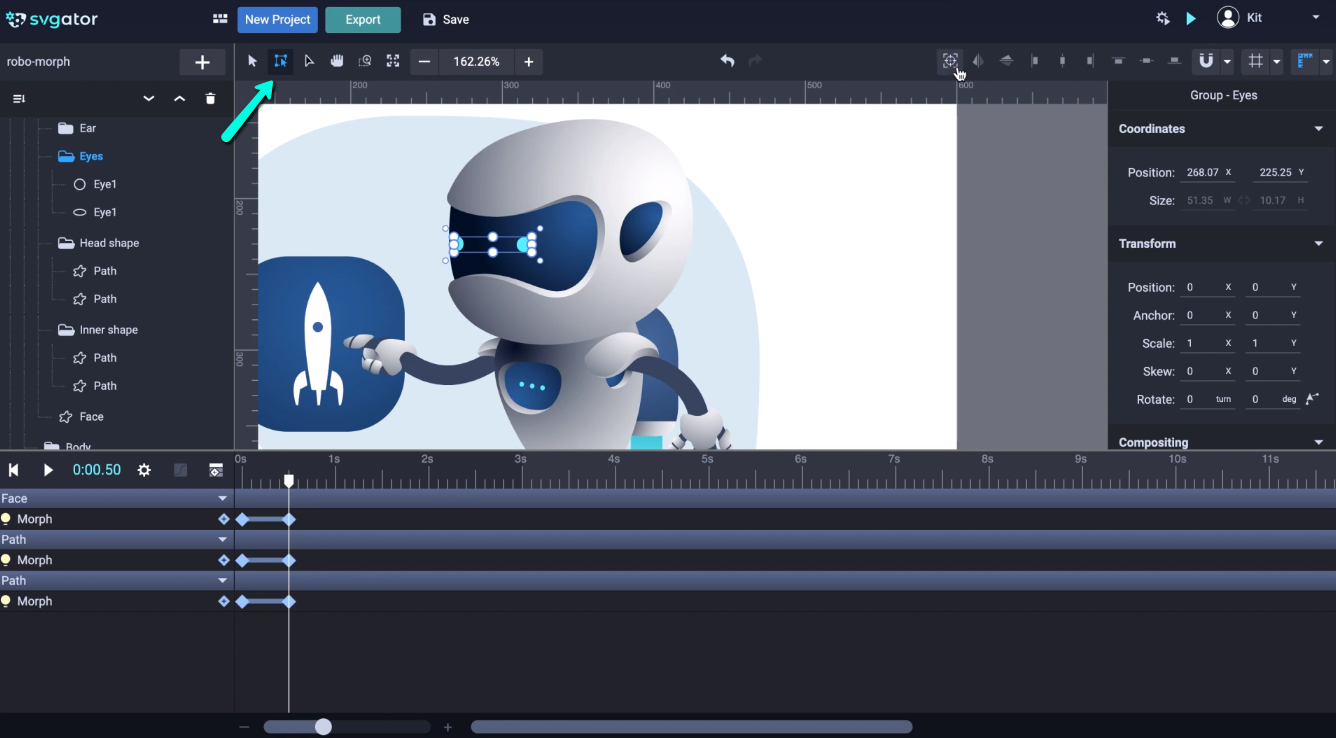
Go back to 0 and press Shift+P for the position animator. Drag the play head to 0.5 seconds and move the group to the right. We also have to scale the eye from the left a little on the x-axis. Shift+S and go back to 0.5 seconds then center the origin. Now scale it up on the x-axis until it looks like a perfect circle. Let's see how the animation looks so far. It looks pretty good up to this point, but we're not quite done yet.
The next thing to take care of would be these 2 elements, here. But first I'd like to lock the elements from the back of it. Select each of them and click the Lock icon. Now let's get back to it. Select both of them by holding down ctrl or cmd for Mac and Shift+M to add the Morph animator. You have the idea:
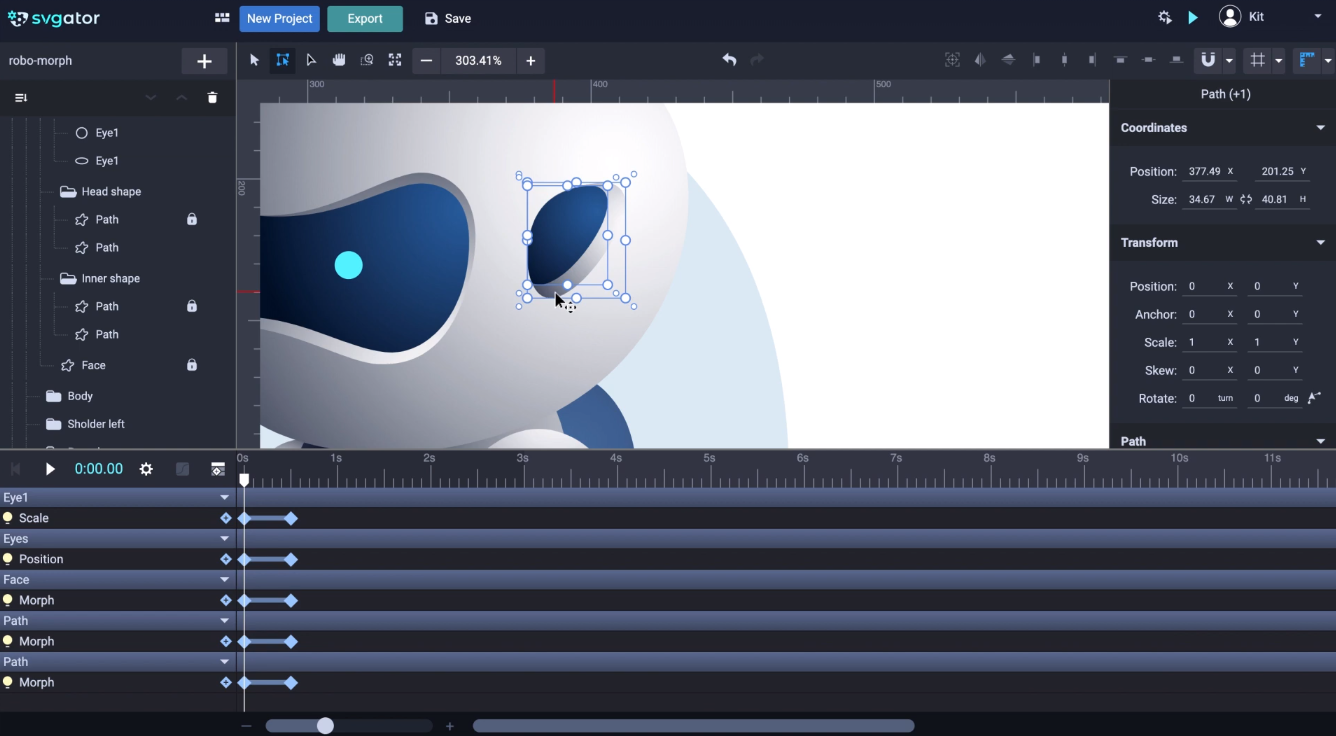
At this point, I'm going to speed up the video again while I'm doing this, and here it is. There is still something I don't quite like here, so I'm going to unlock these elements, and adjust this a little more:
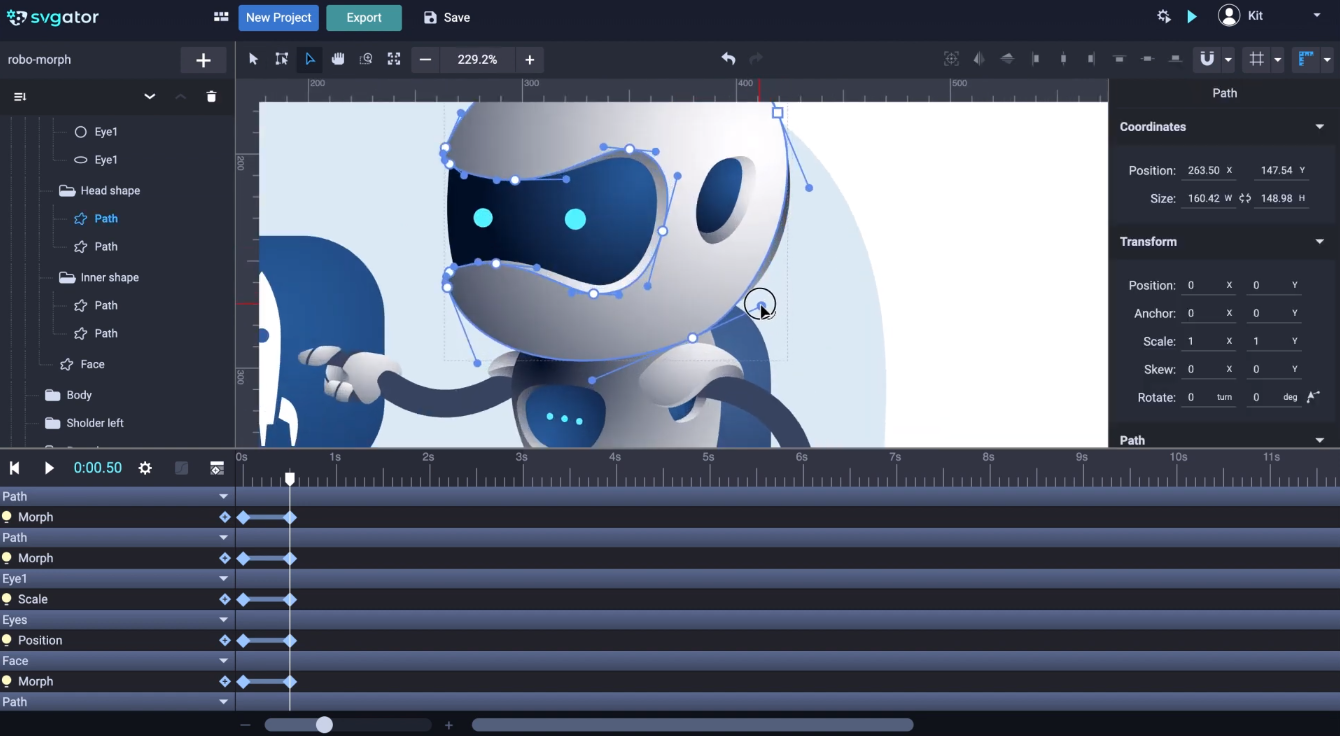
Now I also have to do the same for the one from behind. I just need to hide it. Let's check it again now. I'm ok with the result here.
Don't forget to save your project every so often, trust me. I actually want my animation to start from the point where the head is turned towards me. For that, I have to select all the keyframes from the beginning and drag them after the keyframes from the 0.5-second mark:
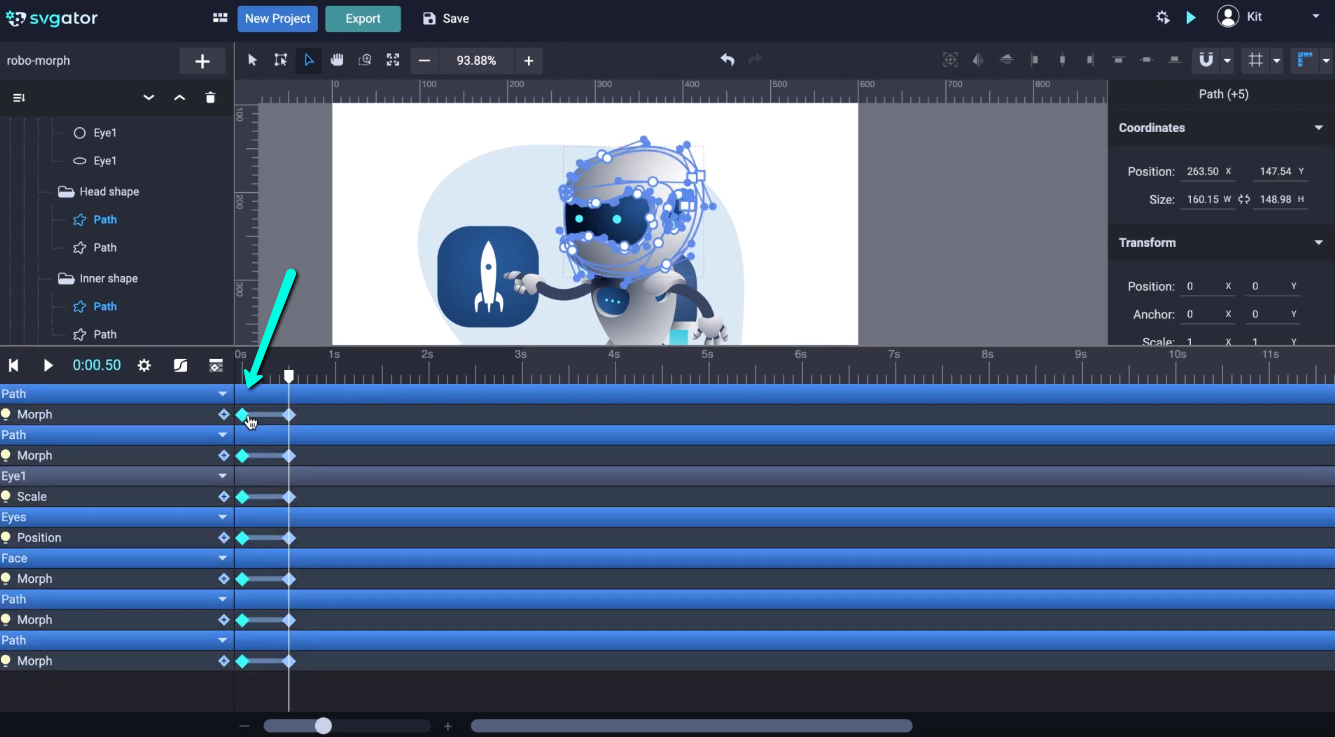
So, now it will look like this. I think I like it a little faster so I'm going to bring these keyframes to 0.7 seconds. We're done for now with the head animation, so let's take a look.
Let's continue with the robot's right arm. I want to animate it to push the blue icon next to the robot. Drag the play head to 0.8 seconds, and zoom in to select the arm, which is a simple stroke path element. Shift+M, you know it by now. Let's bring the play head to 1 second, then add a second keyframe. Now I'm going back to the first keyframe. Because I want the arm to start from a lower position. So I'm dragging this point lower in the canvas, and I also need to adjust the curve. I think this will work just fine:
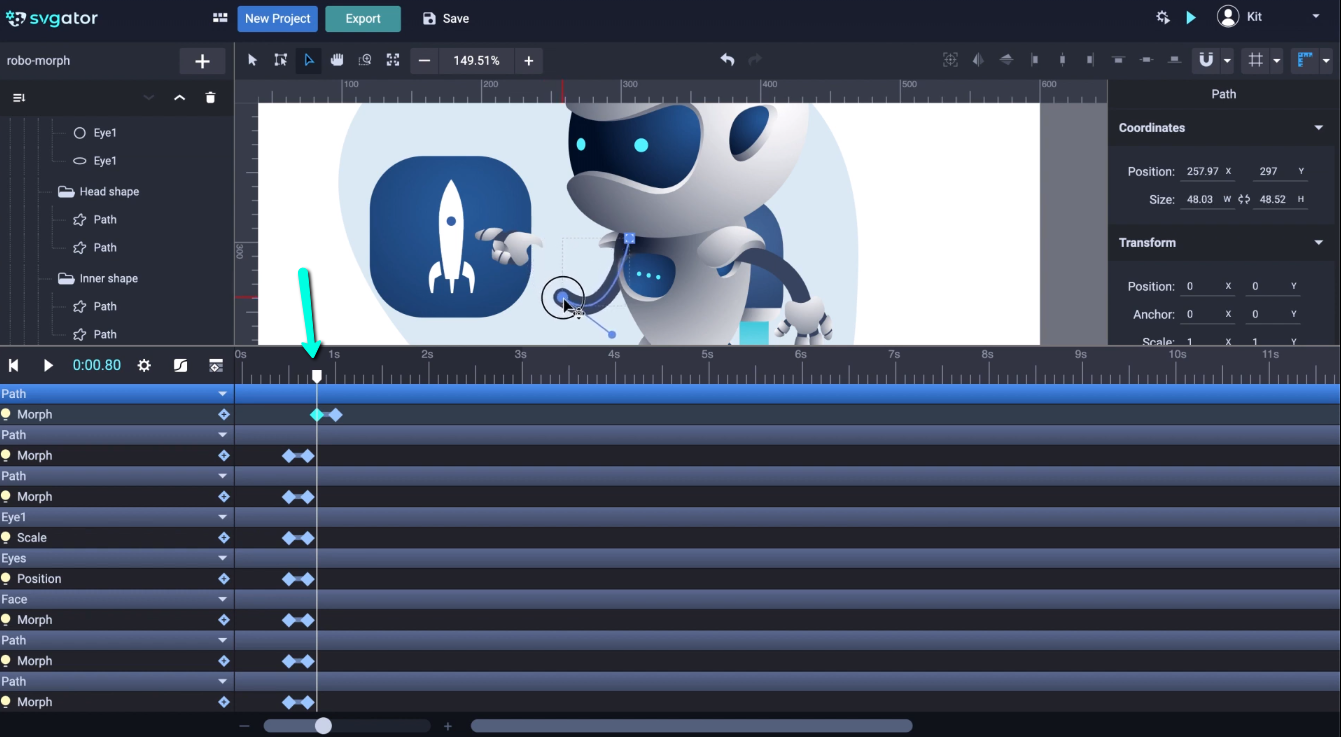
Next, I need to move the hand to sync the morph animation of the arm. Let's find the hand group now. Here it is. Don't forget to center the origin before you start animating. Now choose Position from the animator's list, or use the shortcut Shift+P. We also need rotation which is Shift+R. So these two keyframes will become the second keyframes and we need to drag them to 1 second. And now set the initial position for the arm back at 0.8 seconds. Let's also rotate it a little. And make sure you place it correctly:

The animation looks good here. The arm and the hand looks synchronized, I like it.
Now let's go back to the arm, and before doing anything else, I want to rename it. Double-click and type "Arm path". And make sure you have the play head at 1.2 seconds. So with our arm path selected, choose the Node tool, and bring this point closer to the rocket icon. Then adjust the curve to straighten the arm. Let's do a quick check to see how it looks:

And now we continue with the hand. Drag it closer to the rocket and make sure you place it right at the end of the arm. And also let's and a little rotation to it. Let's see the animation again, good:
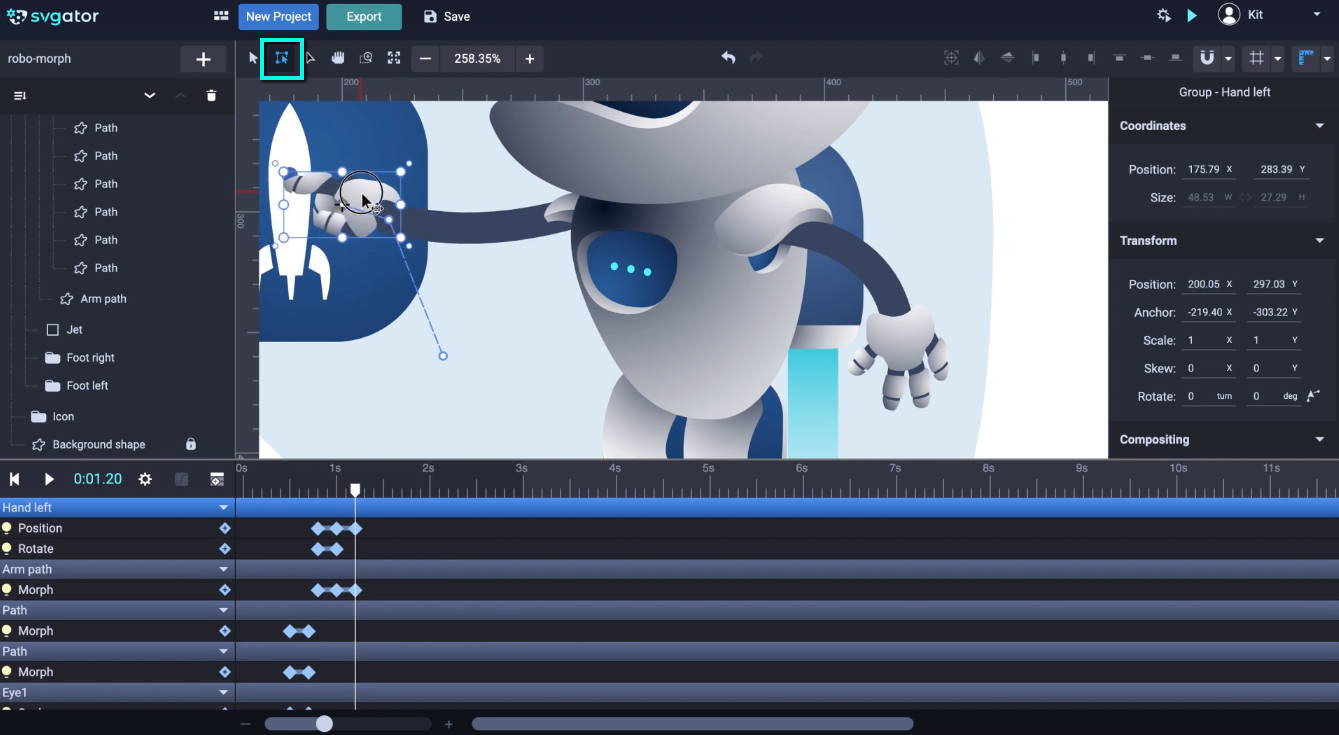
All we need to do now is to animate the arm and hand backward. So I need these 2 keyframes and duplicate them here, at 1.4 seconds. For that use ctrl+D or cmd+D on a Mac:
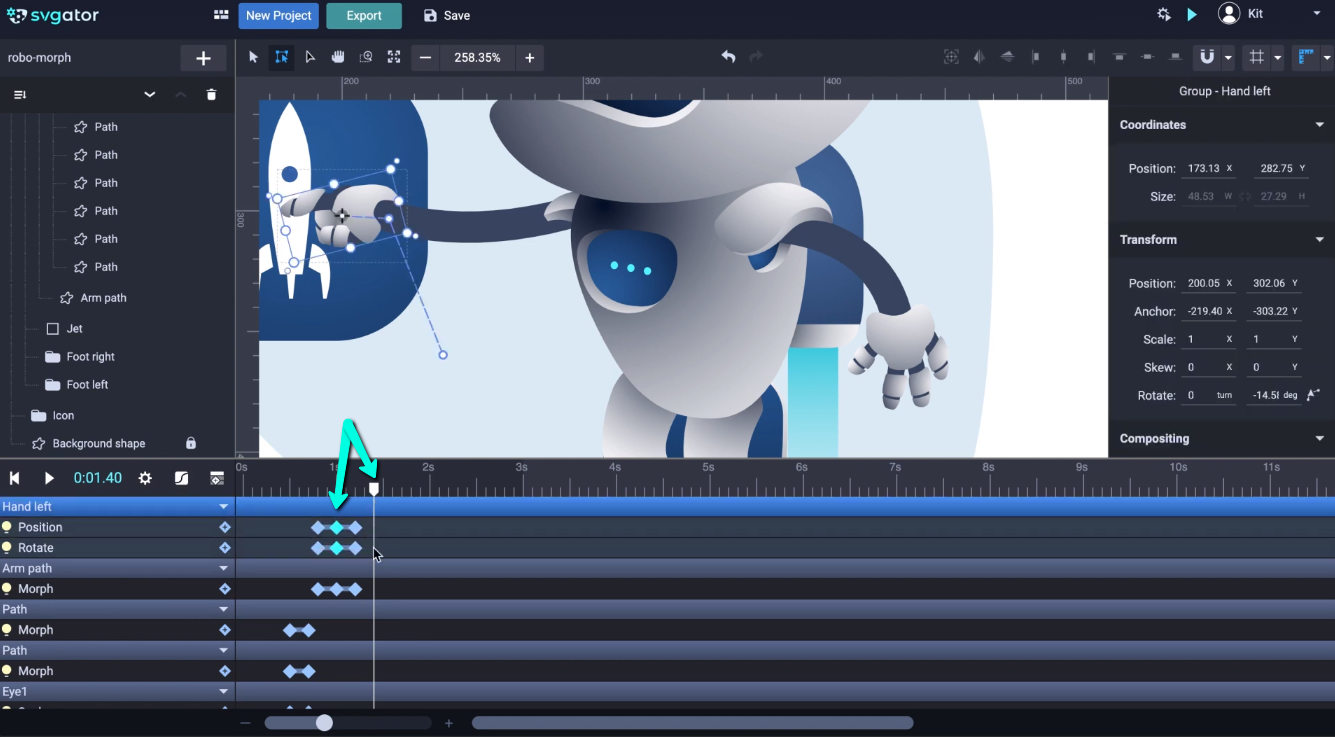
Do the same here for the arm path, and let's take a look. Now let's bring the arm and hand down where they started. Select the keyframes and duplicate them at 1.7 seconds. There, we now have the complete motion of the robot, pushing on the rocket icon.
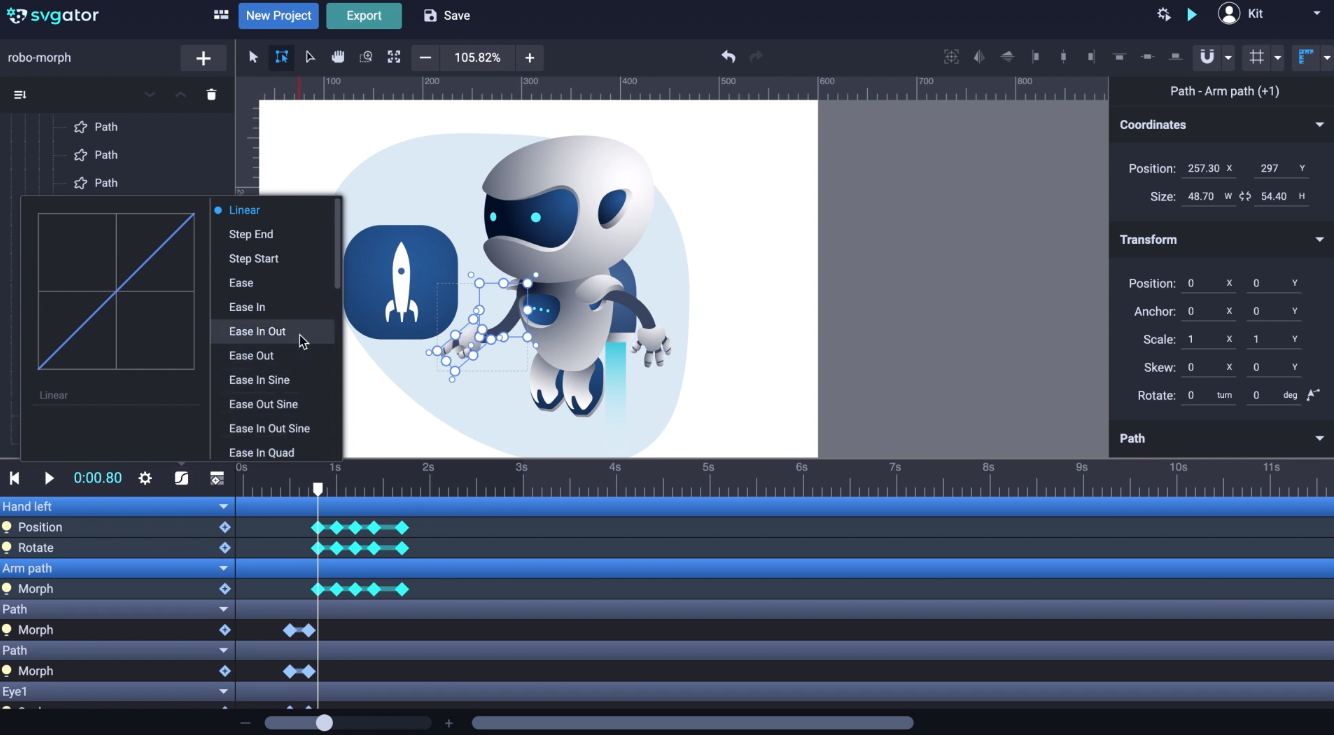
Now that I'm down with the arm animation, I'm going to select these 3 animators holding down the ctrl or cmd on Mac and click here to open the easing panel. In this case, I'm going to choose the Ease In Out function. Ok, let's take a look. You can see the difference here, the motion isn't linear anymore, it looks a little more natural. That looks nice:
Now I want to return back to the head animation. I want the robot to turn his head back towards us after he has pushed the icon. So I'll need to use these keyframes that I've created for the head elements. First I have to duplicate the second keyframes at 1.8 seconds. With the play head at 1.8 seconds press cmd+D or ctrl+D and repeat the process for all animators below:
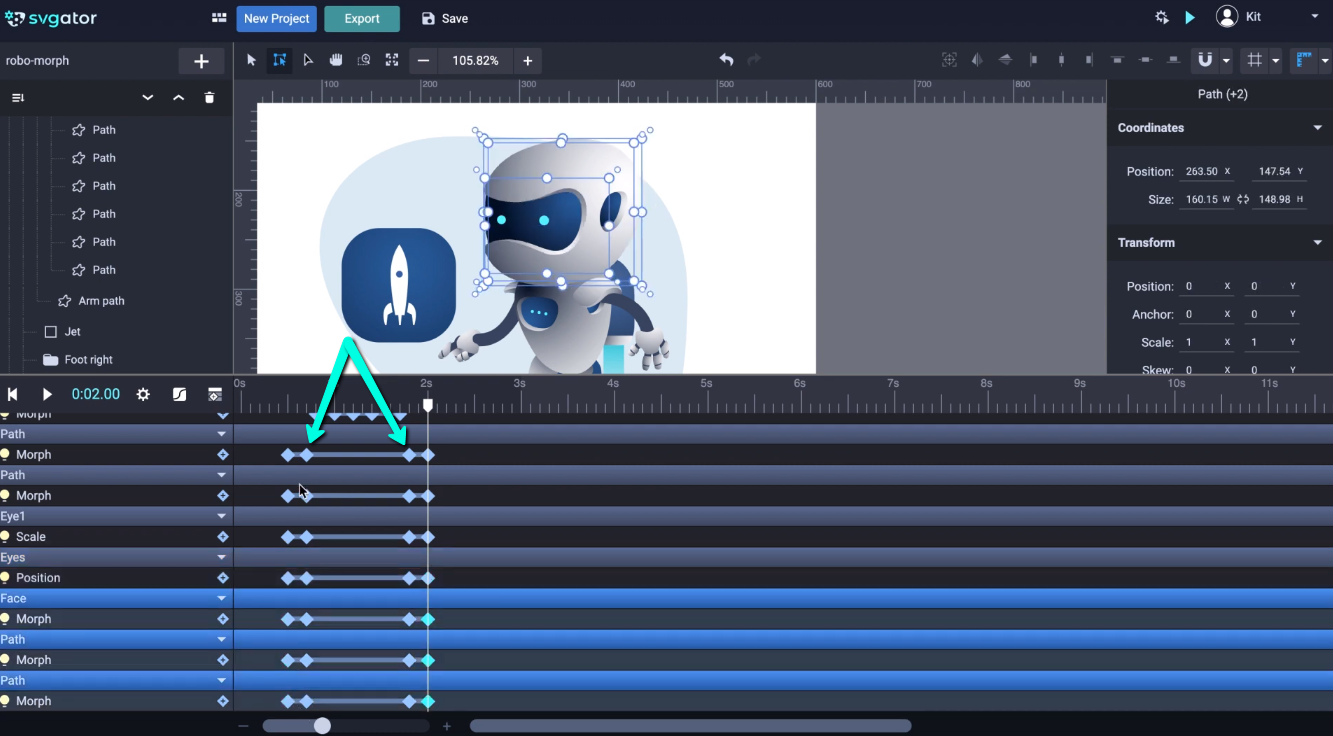
Now drag the play head to the 2-second mark, and select, then duplicate the starting keyframes. Let's see how the animation looks now. The robot is looking at the icon then he presses the icon, and then he looks back towards us. Let's hit play on that one more time. Great.
So let's continue by animating the icon. We will morph this rocket into an airplane, so let's start with this shape here. Bring the play head right at the moment where the robot’s finger reaches the rightmost point. That would be here for about 1.2 seconds. I will now add the Morph animator, Shift+M, and I will collapse all of these elements from the timeline which we are done animating:
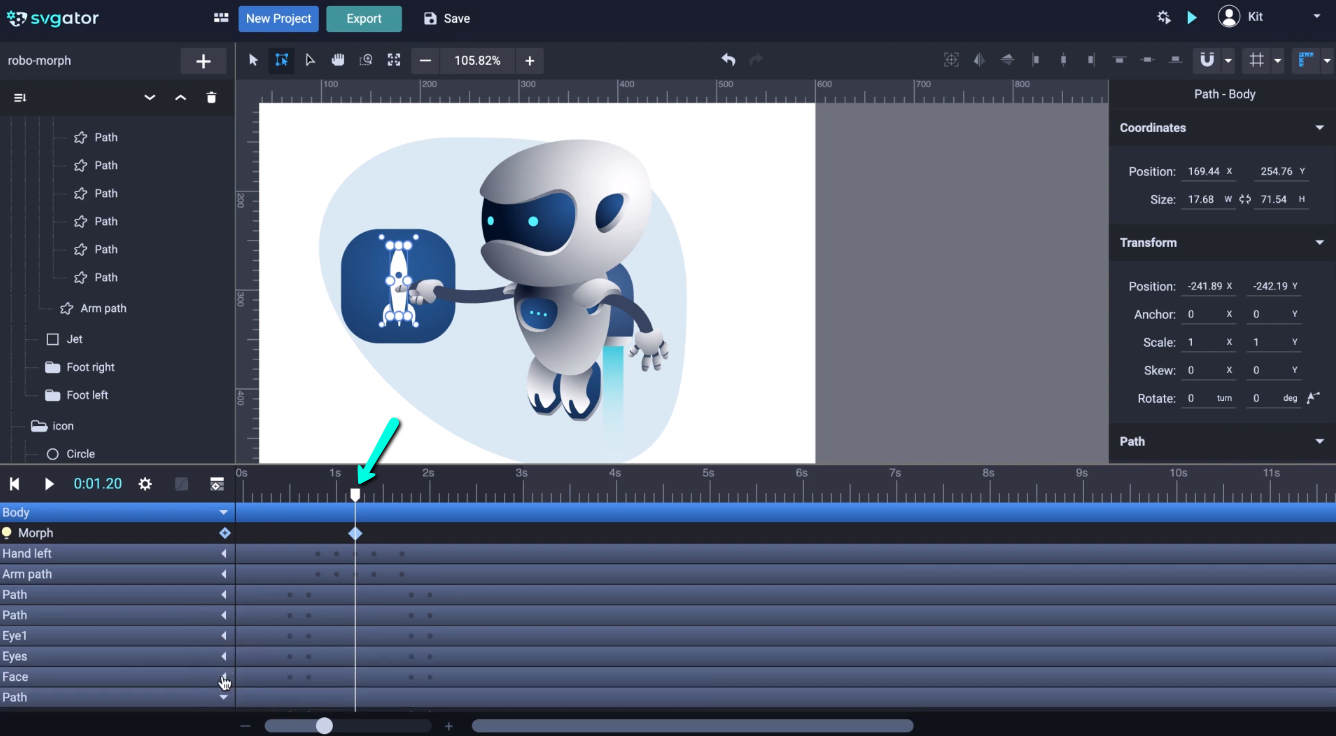
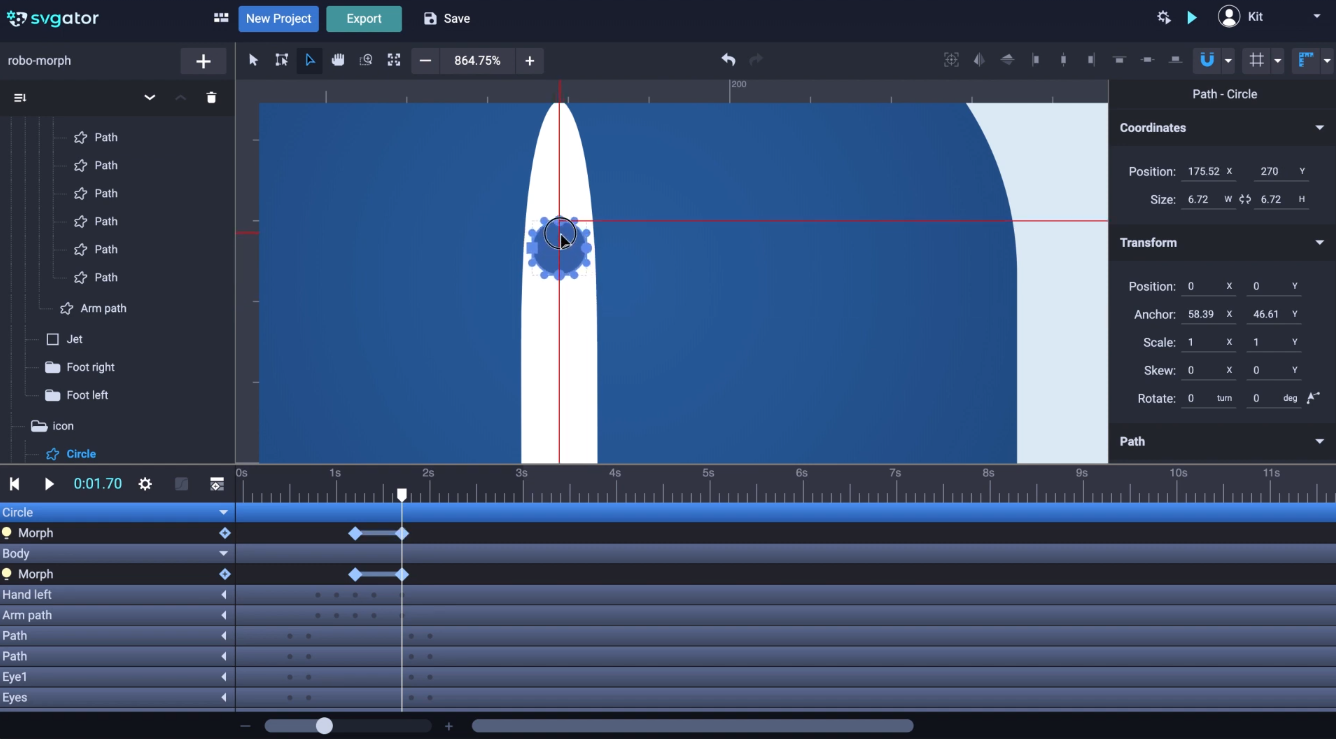
For this part, I'd like to enable the snapping options by clicking the magnet up here. Drag the play head to, let's say 1.7 seconds, and let's start creating the new shape. I'll need the Node tool for that. You know the drill, that's right, I'm going to fast forward again. Alright, I also need to transform this round window to look like an airplane window. Here we can see the type of element we've selected, it's a circle. It's not a path:

The Morph animator is only available for path elements. So I need to convert the circle into a path element. Right-click and click on "Convert to path". You can see here it's a path element now, and the name of the element is Circle.
Now let's select the Node tool, and place the play head to add the first keyframe. Shift+M scroll up and here it is. Now let's set the time, and I'm going to move up all of the points at once. This isn't a position animation for the circle element, it's still a morph animation because we interact with the points. Even if it looks like a position animation, no position animator will be involved, only the Morph animator. So let's start with the first point and I'll fast forward again for this part, there we go:
Let's take a quick look. Now I'm going to quickly adjust the back part of the plane. Ok, I'm done, now let's get to this back wing from the center, Shift+M to add morph. Drag the play head to 1.7 seconds, real quick there is something I want to show you. It's important to have the right number of points for morph animations. These look like a 4 point polygon, but I also inserted a couple of extra points, here and here:
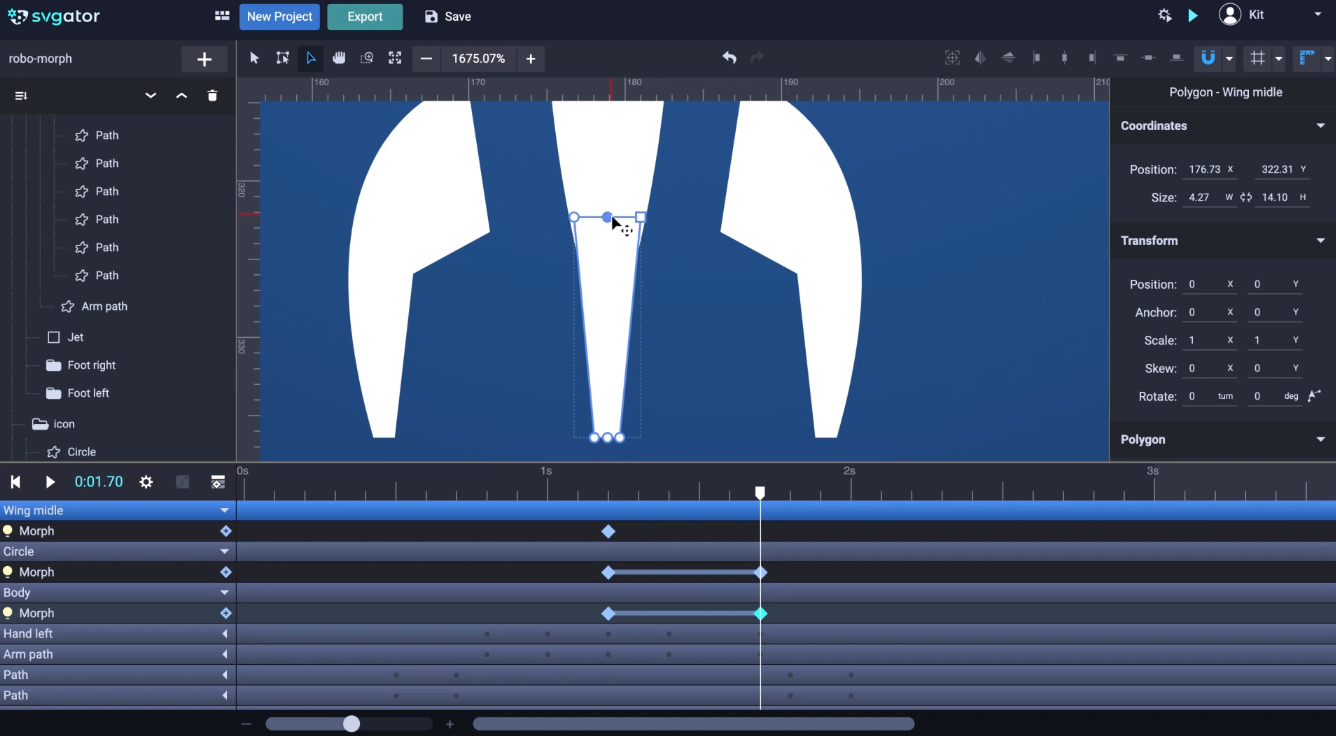
I added those points when I created the path before importing the SVG in the SVGator, and that's only because the initial 4 points aren't enough to morph this path to the shape that I want. You'll do that in a few seconds, there. Now it's a little easier to understand why those 2 extra points were so necessary. Now let's keep going with the left-wing and transform it into an airplane wing. Ok, let's take a look:
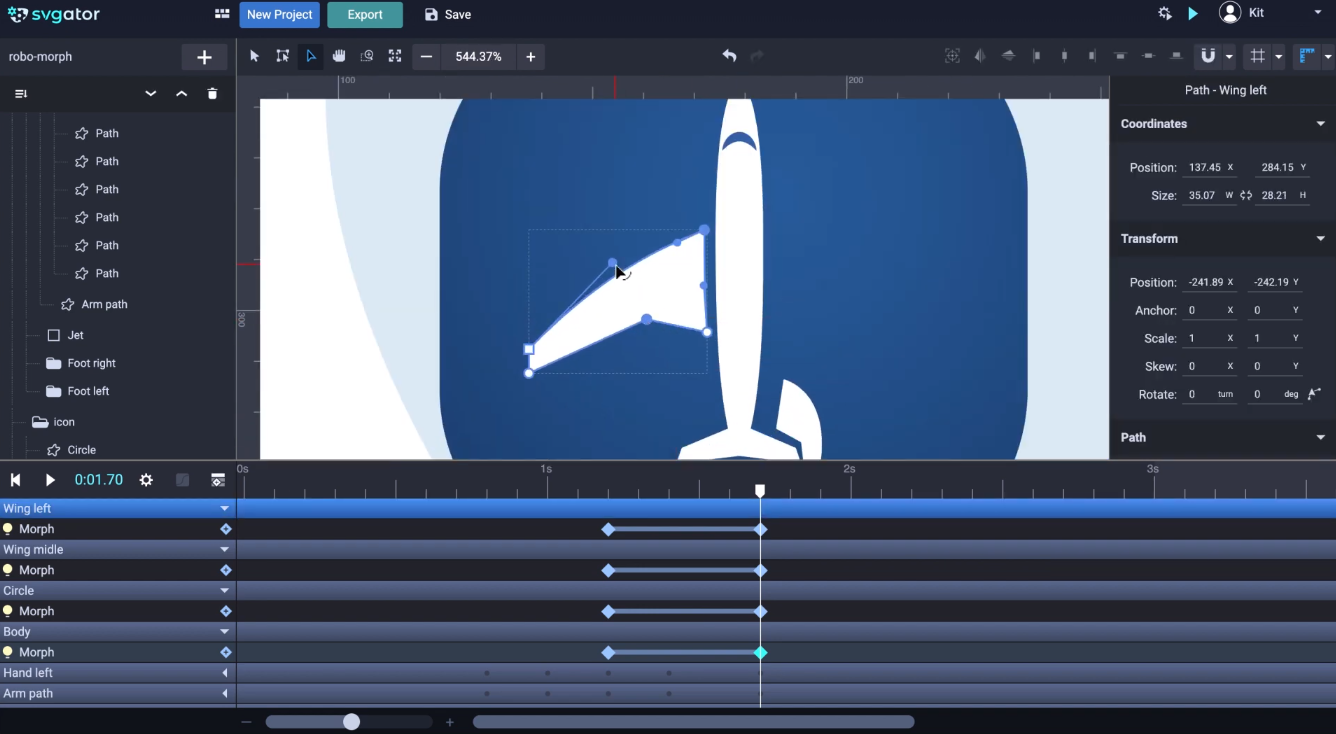
Now we need the right-wing to animate exactly the same way as the left-wing. For that, I need to reposition the origin point for the left-wing. I'll bring it to the right and snap it to the center of the rocket.
It doesn't matter where you placed it on the Y-axis. It is important to be centered on the X-axis. Now, select the right-wing, and delete it. Select the left-wing, right-click, and duplicate. The duplicate will also have morph animation duplicated as well, so now we only have to flip it over by clicking on this button, here:
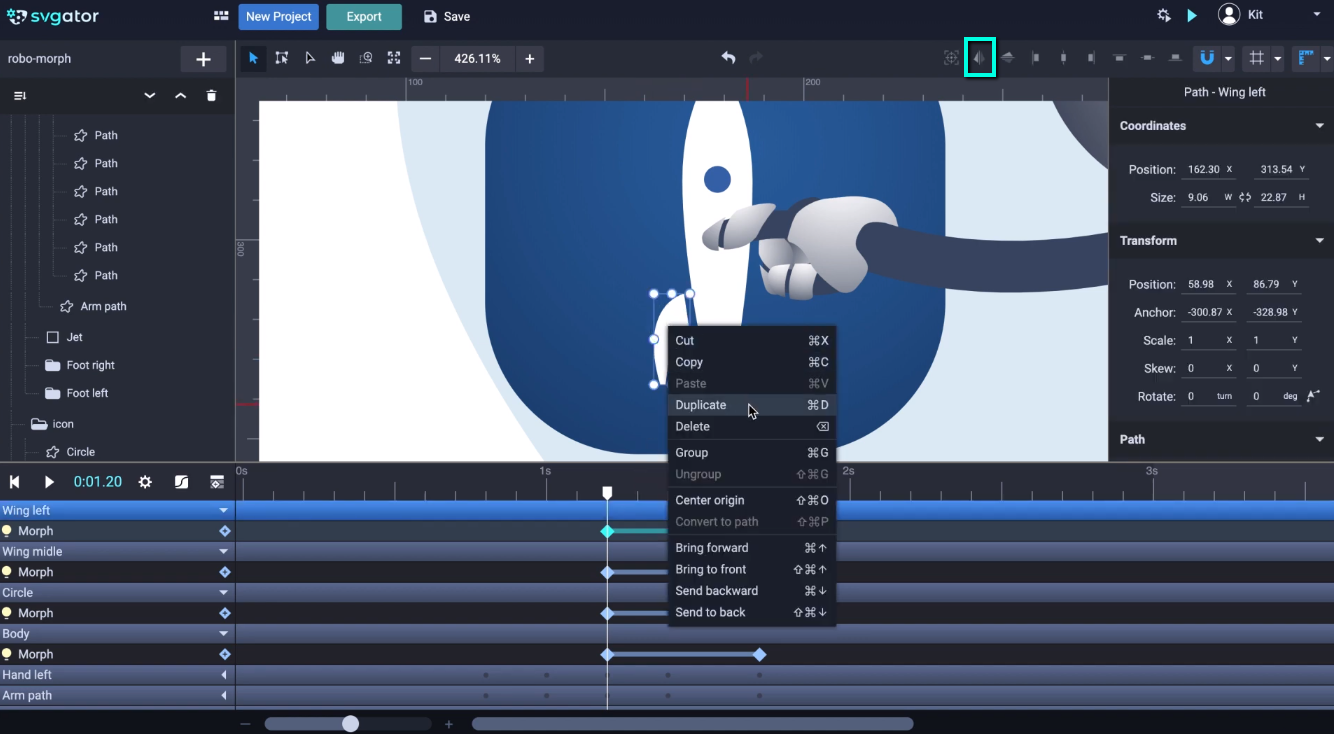
And now we have a symmetrical animation for the wings. Let's take a look now at the whole animation.
Next, I'm going to animate the shape of the icon's background, the blue rounded square. I'll use a different animator for this that will work only for the type of element, for rectangles. I will show you how to change its shape into a circle. You can see here the element is a rectangle. That means the Morph animator will not be available. Unless I convert it to a path. But I'm gonna leave as a rectangle because I want to animate the corner radius which is available for rectangles only. Here are the corner radius properties, and from the animator's list, I'm going to choose the Corner radius animator:
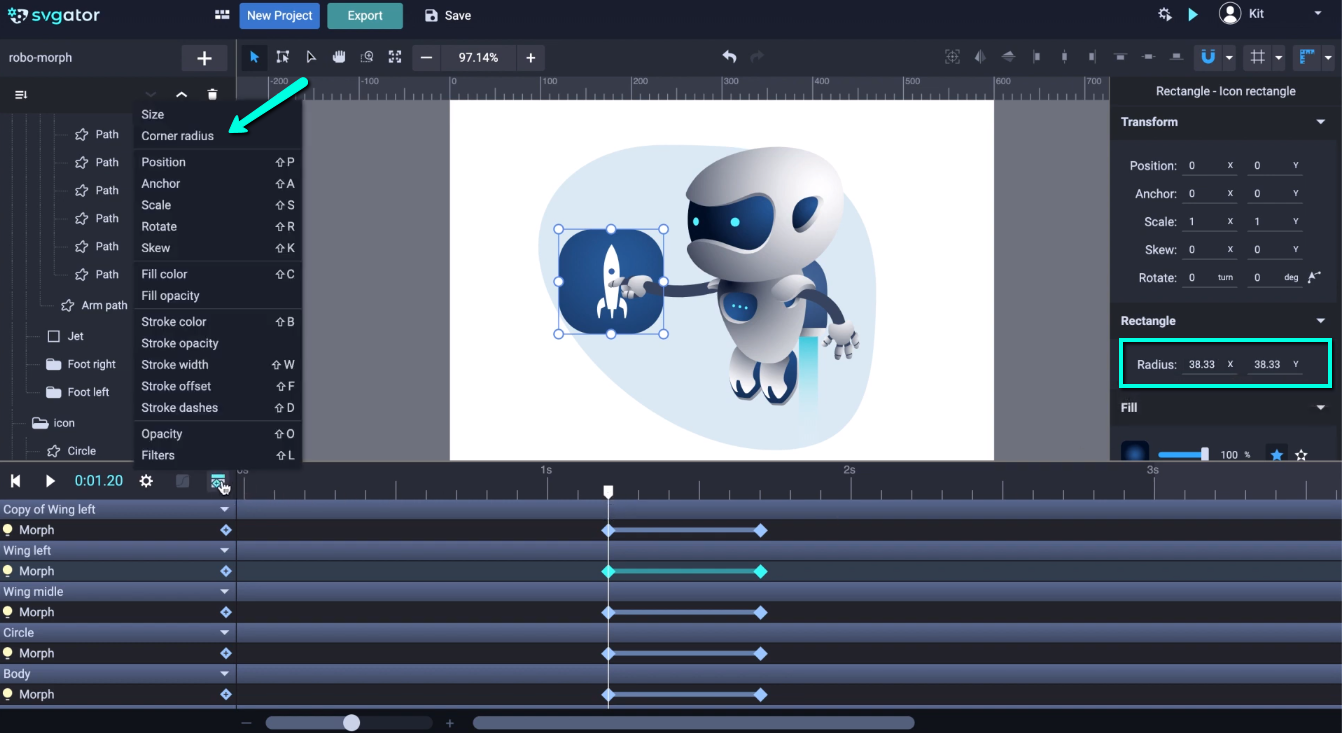
Now, I will set the timeline for this animation. And change the radius properties let's say to 100 for both X and Y. Now let's see how this looks. The rectangle increases its corner radius all the way to the point where it becomes a circle. I also want to add some rotation to this, will look a little more interesting. Set the play head, then I need to center the origin. And now I will rotate it 90 degrees while holding down Shift before clicking. Combining two or more animators like this will always make things look a little bit more interesting.
I will continue this project by adding the rest of the animations which do not include morphing. So if you're only here to learn about using the Morph animator, you can stop watching this video now. But stay with me especially if you want to see how I add the final touches and finish the project. I will continue by setting some easing functions and, adding some basic animations. Ok, so let’s keep going. Let me expand the timeline section a little, and as I said I will complete the project. I want the animation to start with the airplane and then morph into the rocket. So, I'm selecting the segment between the keyframes then, right-click and reverse keyframes:
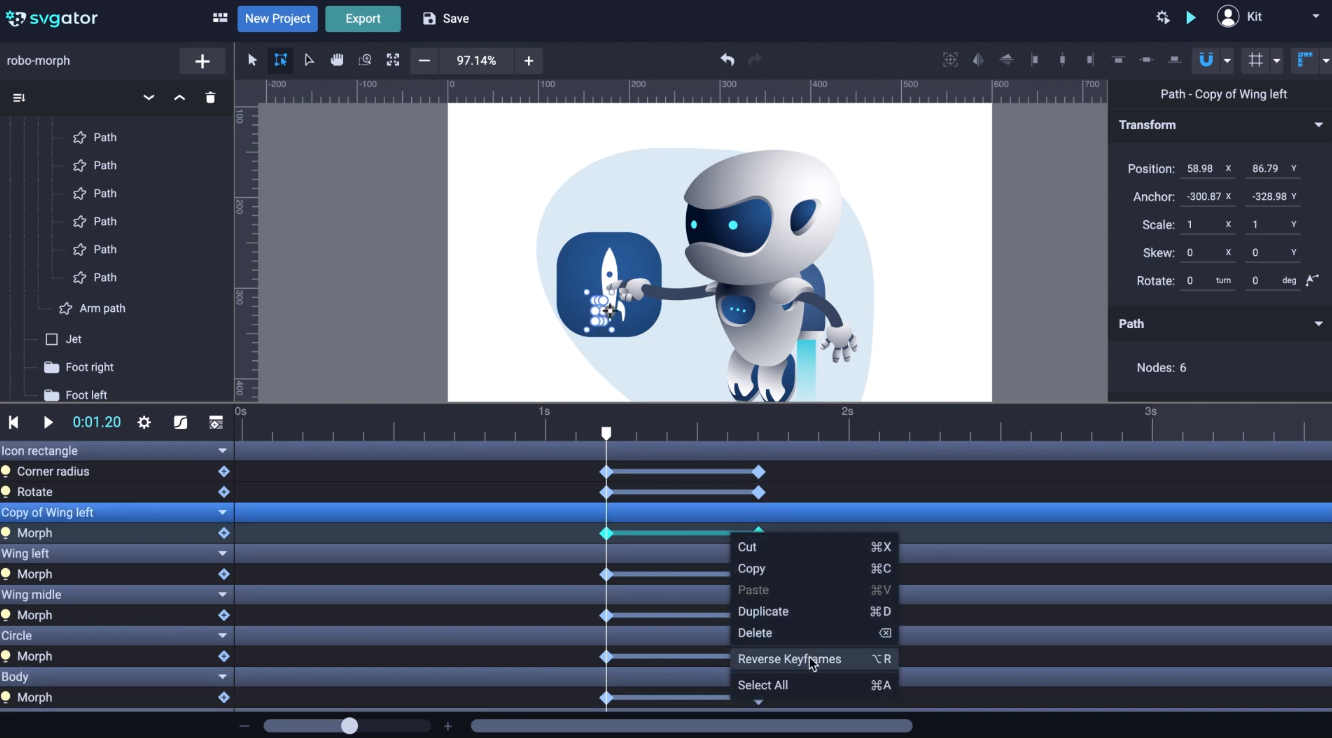
And will do the same for the rest of the morph keyframes, there we go, and done. Let's go to the animation settings, here on this cog icon, and set it to Infinite:
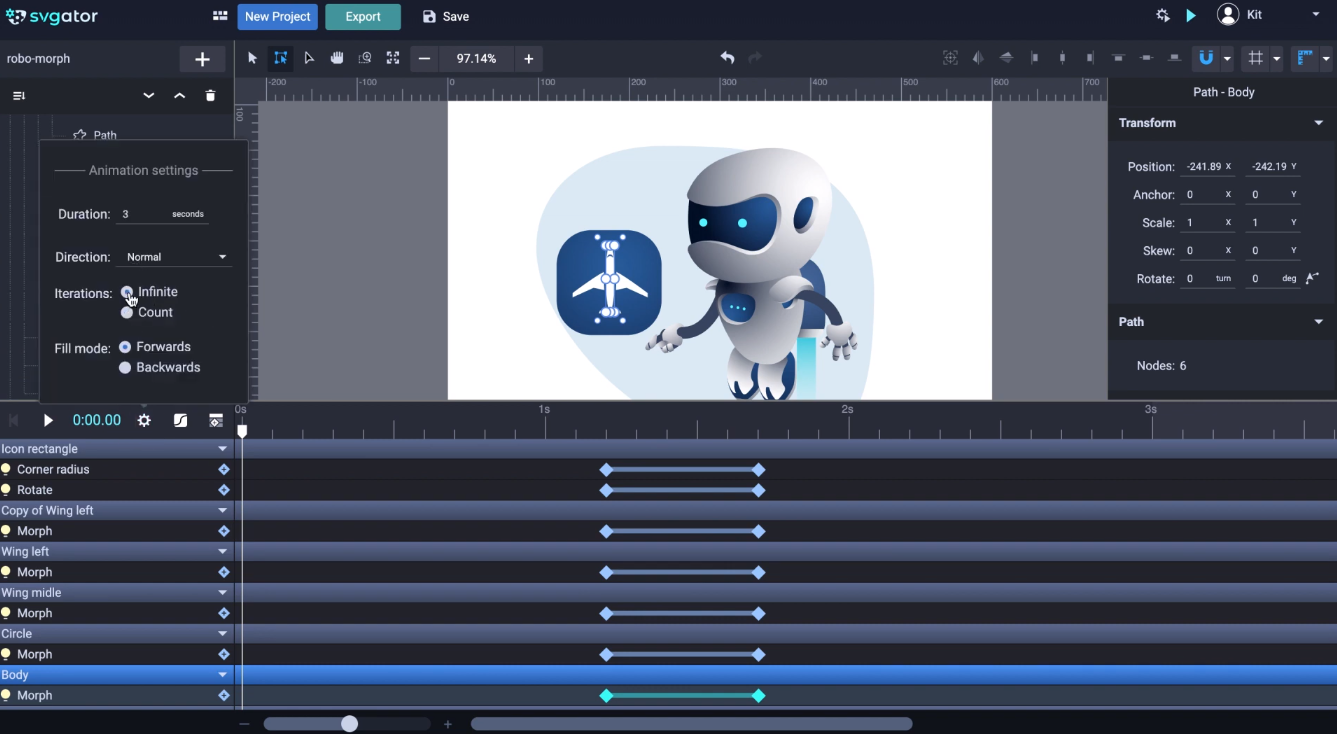
This will play the animation in an endless loop when we preview it and export it, so let's go to preview. This is how it looks so far on a loop animation.
Now I'll go with the rest here. I want to animate the icon animate backward, after a short pause. The same way I did for the robot earlier in the video. So I'm gonna duplicate the second keyframes, here. Make sure you do that for all of the animators you've used for the icon. Then drag the play head forward a little, and duplicate the first keyframes the same way:
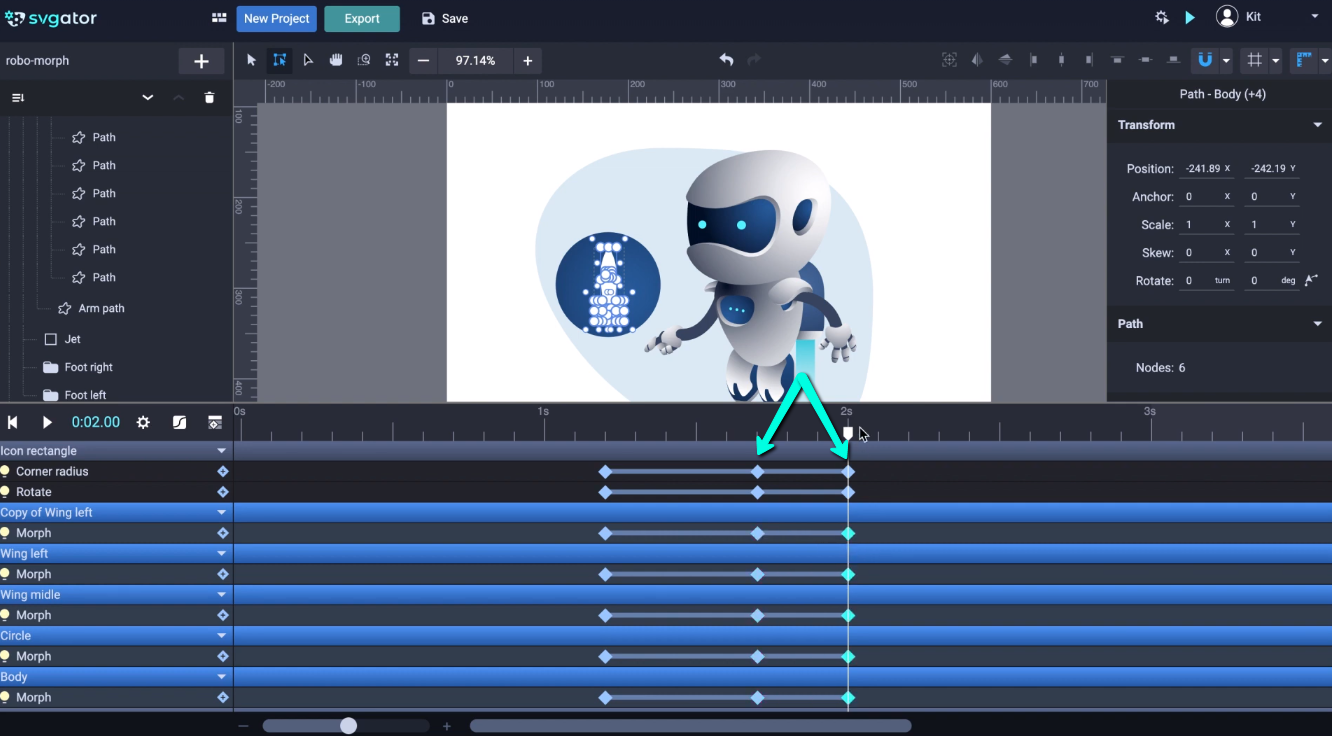
Actually I want to increase this range a little more. And let's preview once again. I still have to work a little more on the timing, so let me speed things up a little bit.
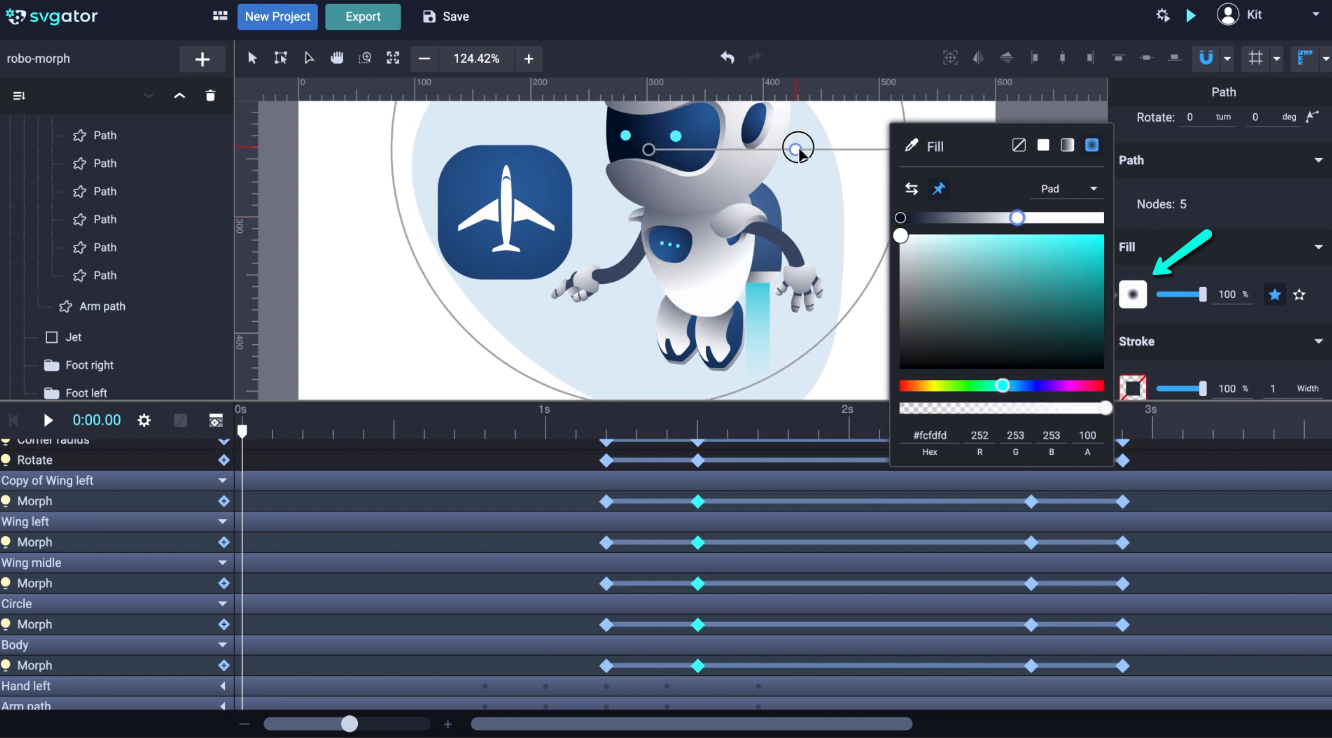
Maybe you've noticed already that there's a gradient on the robot, which could look a little better. I'm talking about this one, right there under the chin. So let's fix that. Go to the fill properties, and click on this square. For some reason, this SVG has a lot of unnecessary gradient points. So let's get rid of them, and work with only 2. Just click then select and delete. I also quickly need to adjust the gradient position a little, there:
As I've mentioned before, I'm gonna add a few more easing functions for the last animations that I've made. And I'll go again with Ease In Out.
I want to add a floating effect to the robot, making it look like he's slowly levitating up and down. So select the Robot group, don't forget to center the origin, then Shift+P to add the position animator. And I want to set the timeline to 4 seconds. Go to the first seconds, and drag the robot group down a little. Now go to the 2-second mark and duplicate the first two keyframes:
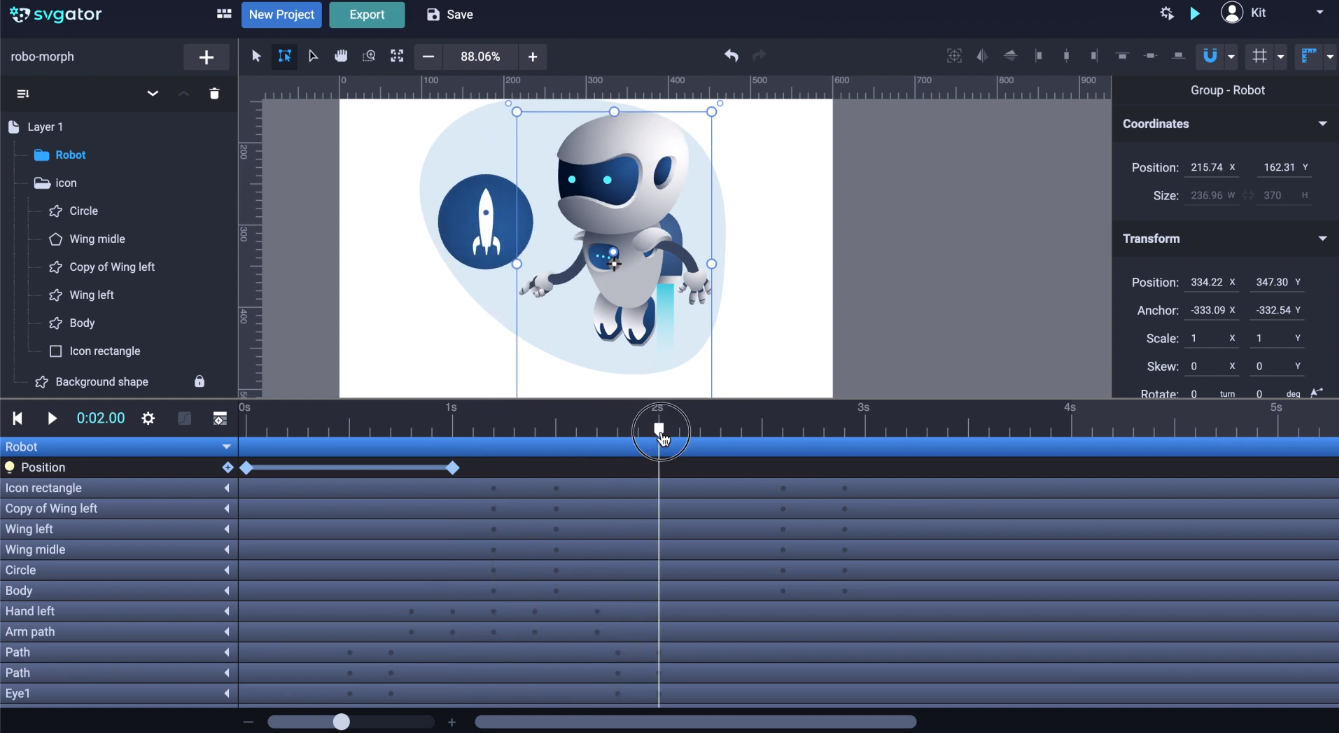
Also, duplicate the first keyframe to the fourth second. And now a quick preview. Let's add some easing for this, Ease In Out. And I'll customize just a little, there.
Now let's go to this robot's jet propulsion flame coming out of his backpack there. Shift+S to add the Scale animator, and I'll sync the timing with floating animation. Go to the 1-second mark, I will scale this only on the Y axis, up and down. So let's place the origin top center, just like this:
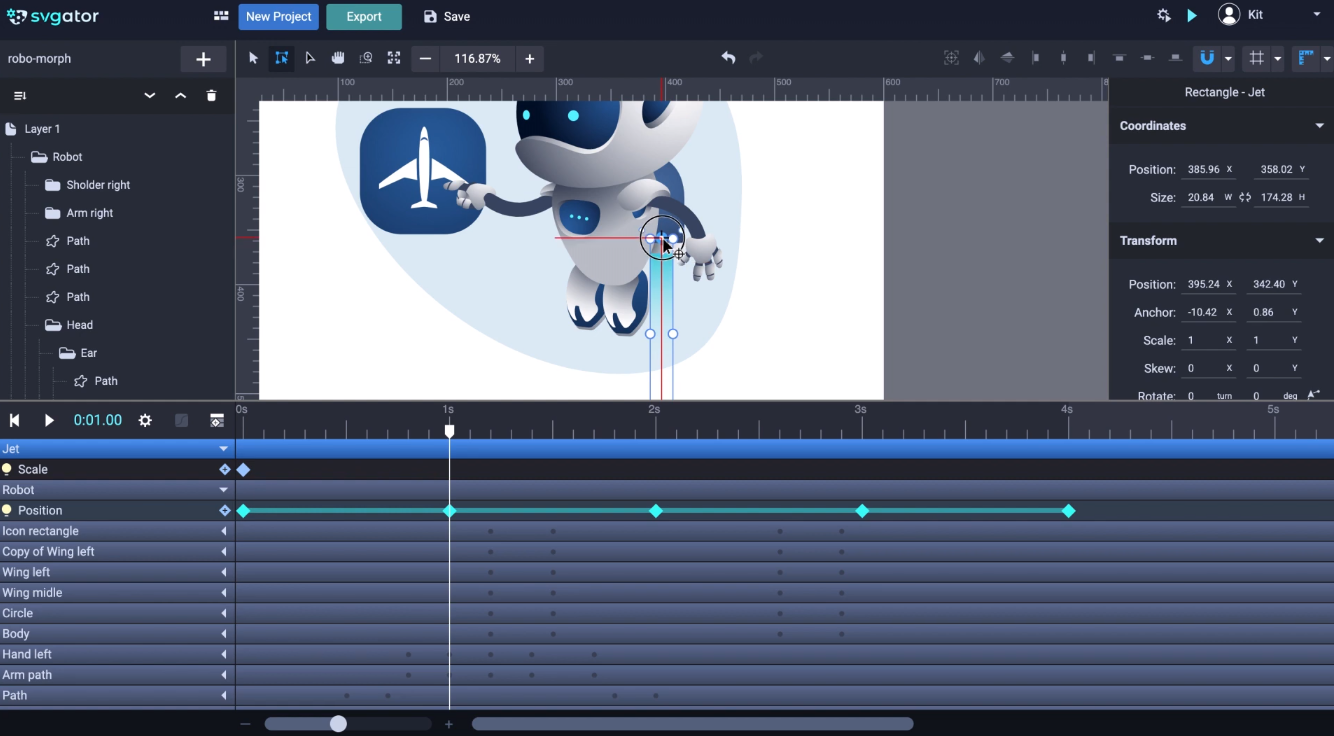
Now scale it down on the Y-axis. We can also set the easing now, and I'll use the custom now from before. Now in duplicating it, we'll also keep the easing that I've set. Duplicate the keyframes as we did before, for the floating animation.
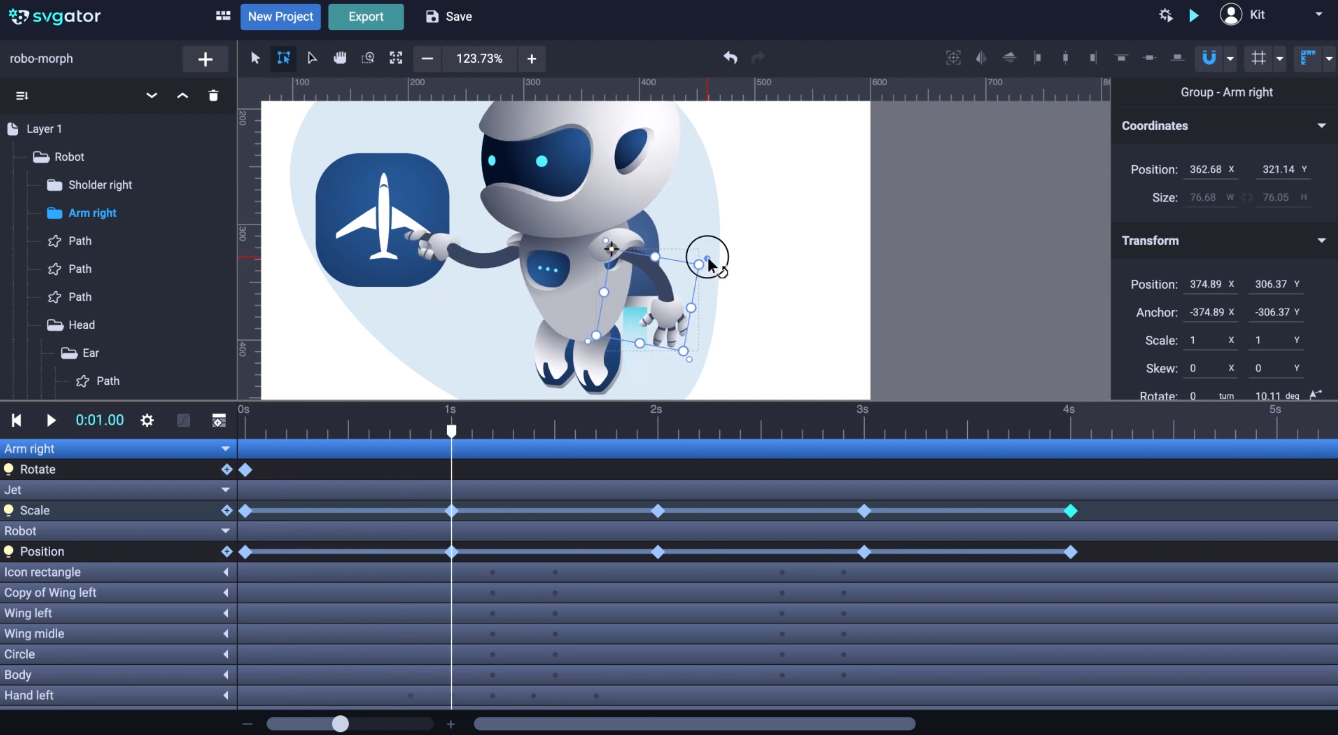
Next, let's take care of this arm, and set a smooth motion up and down as the robot floats. Select the arm right group, and reposition the origin point top left. Shift+R to add the Rotate animator and drag the play head to 1 second. Actually, I want to rotate the arm a little from the beginning. And now at the first second, rotate it back. Let's also add our custom easing. Then duplicate the keyframes. Let's preview it:
Continuing now with the Shoulder right group. I'll animate and sync with the arm motion. I'll place the origin here, and Shift+R for rotation. And we'll speed through this part. Now for the other shoulder, we'll sync it with the arm below it. I'll fast forward through this again.
I should add a Scale animation to the icon and those dots. I’ll use the Position animator to animate them to look like some kind of loader. So Shift+P for all of them, then drag the play head, not too much, then move them up:
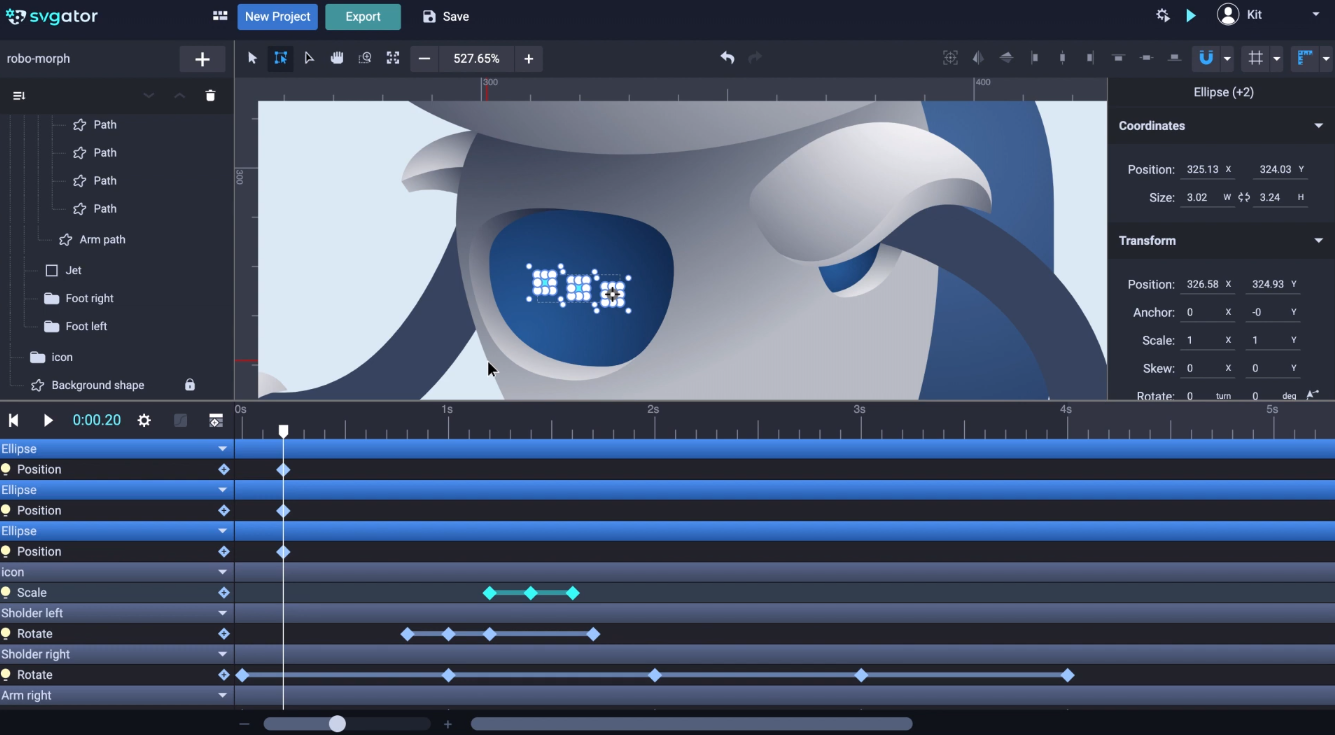
Drag the play head further, the same distance, and duplicate the first keyframes. I don't want to move them at the same time, so I'm gonna set a short delay between them, just like that. There, it looks like a message loader. It gives the impression that the robot is communicating or processing some information. I want this loader animation to start before the push, and also make it a little bit faster.
I'll duplicate these keyframes because I want the loader to animate twice. I'll quickly add some easing, and I want to repeat this loader session again right after the push, about here. So I'm going to quickly duplicate the keyframes starting from the 2.2-second mark.
And we're done. This is how you can animate a character using morph, other basic animators, and SVGator. I hope you've enjoyed this video. Please check out all of our other videos. Thanks for watching.
Still got questions? Send us an email to contact@svgator.com and we will get back to you as soon as we can.