Motion Path Animation - Animate Any Object Along a Custom Path
Duration: 14:54
In this tutorial, you will learn how to animate SVG along path. Just by adding the Position animator, you can animate an element along a custom path and change the path's shape by adjusting the beziers.
You will find a written version of this tutorial below.
I will show you how to customize the motion path of an object, how to control its movement and timing along that path. I will animate these two race cars, racing on the race track:
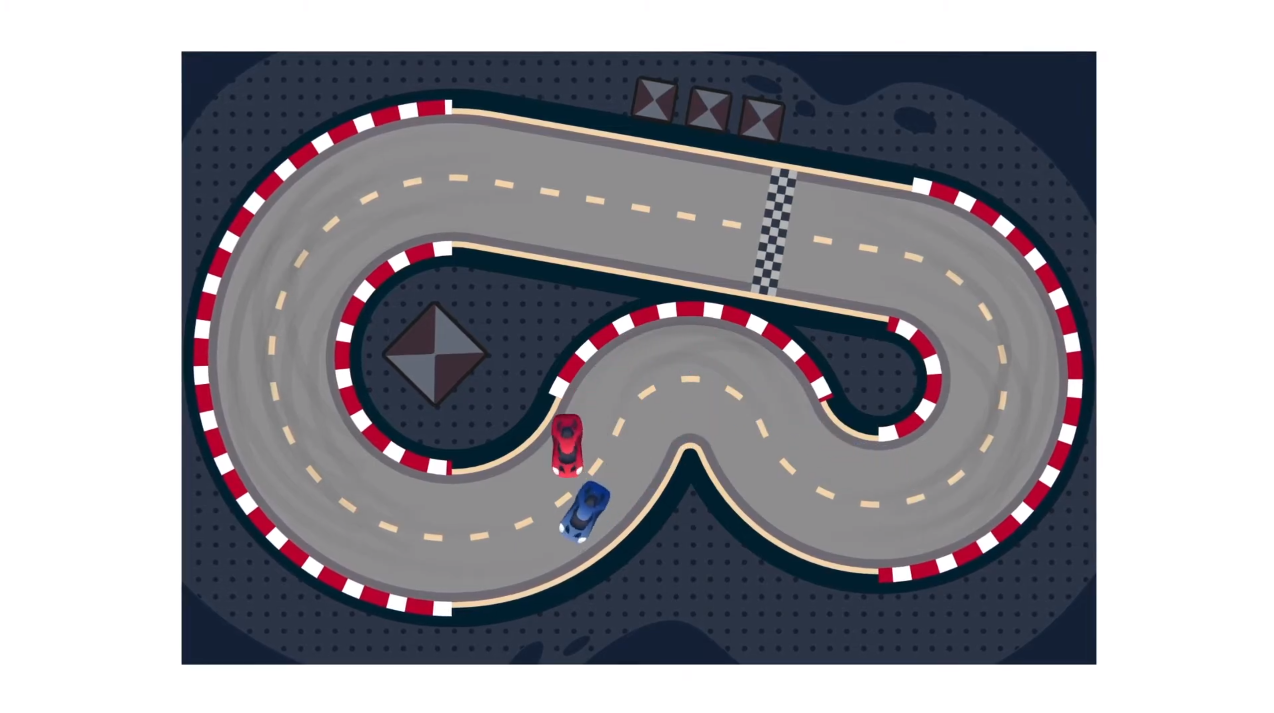
For that, I will use the Position animator, but I'll also work a little with the Rotate animator for the drifting parts. I have all the elements of this race track inside of this group, which I'm going to lock, so I won't select anything from it by accident:
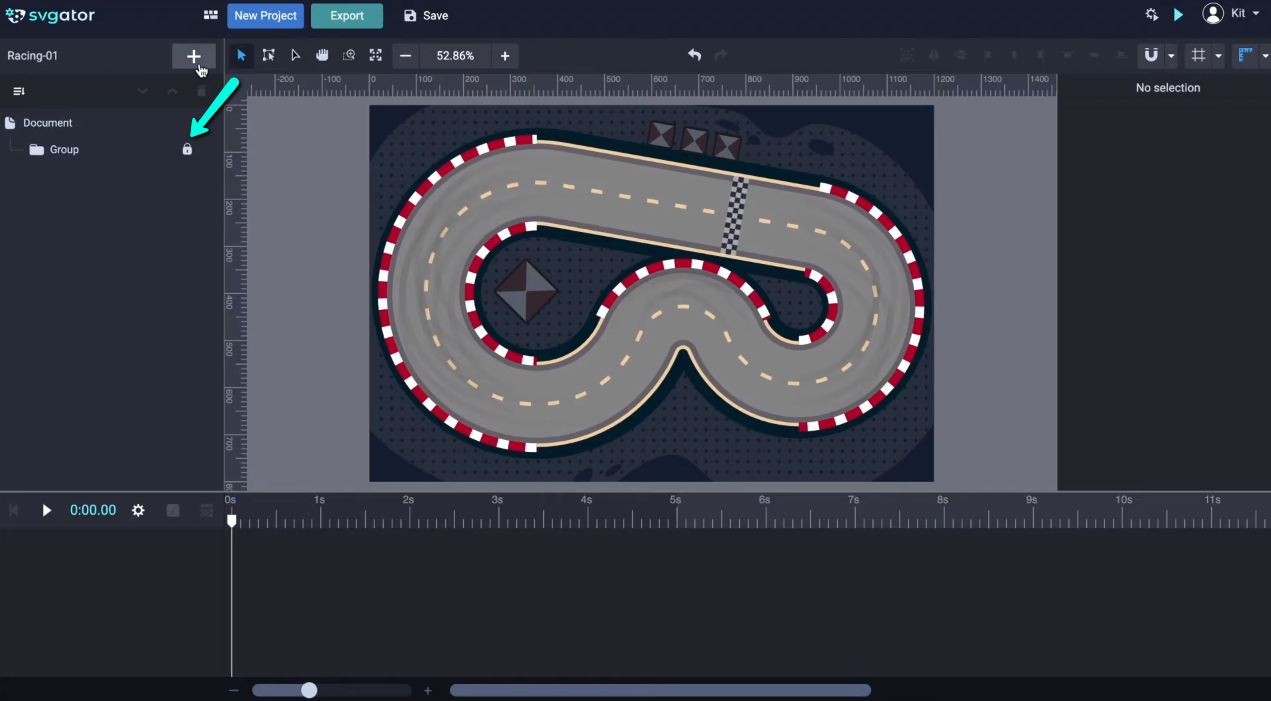
I'll now open the Library and add the first car I'm going to animate. I've made these two SVG files, and I'll import the red car for now. Click on it and place it on the race track. Select the Transform tool to see the origin point and center it:
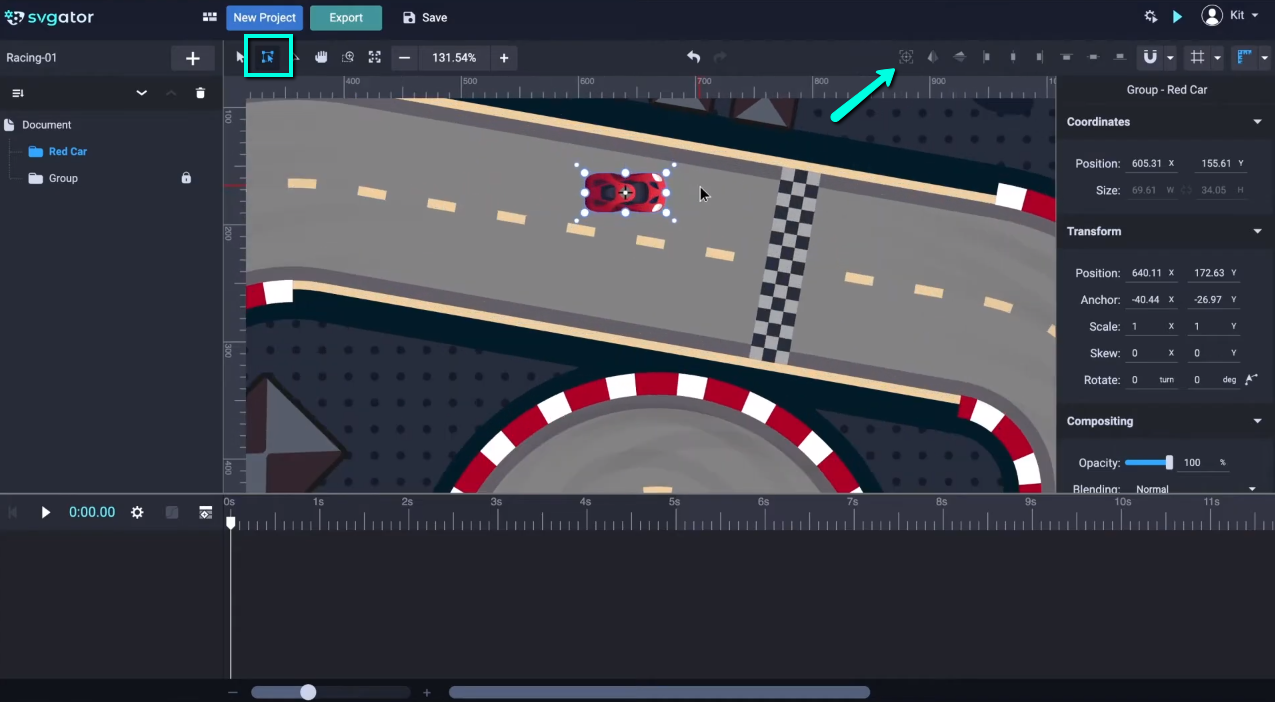
I also want to scale it up just a little bit. And I'll scale it up to 20%, that will be 1.20 for both X and Y, and I will also rotate it a little bit.
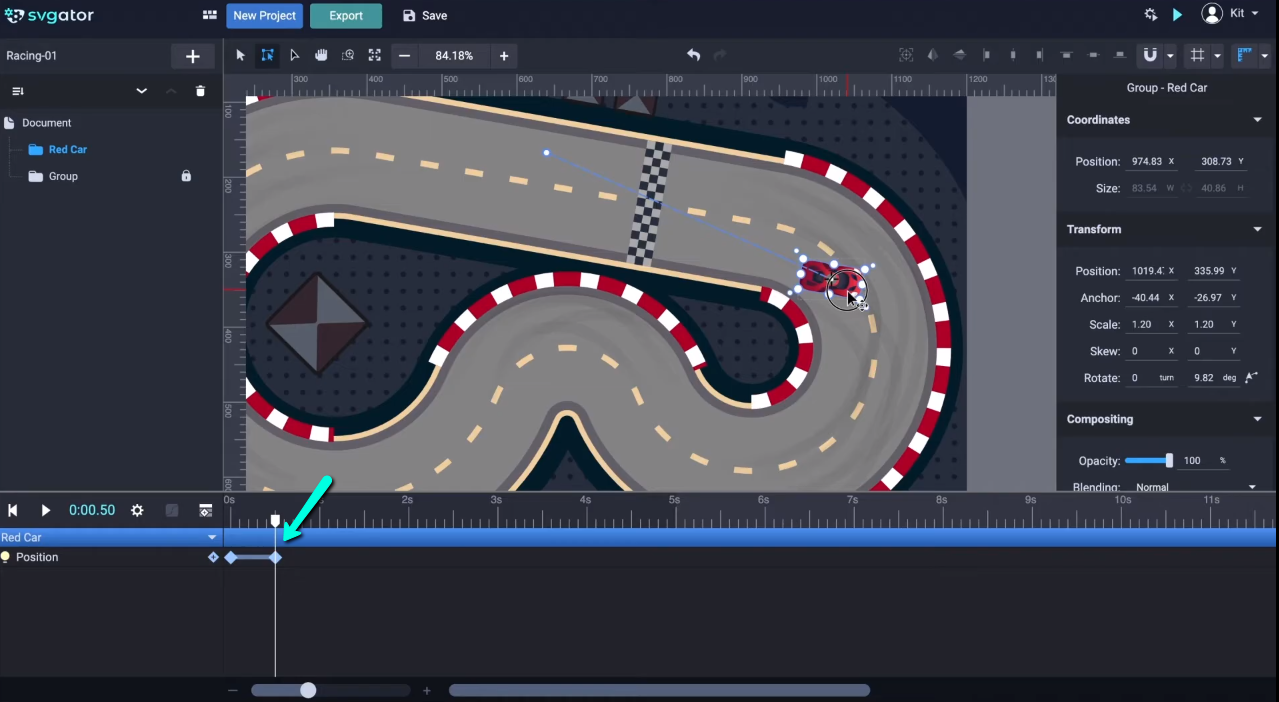
Let's start working on the first motion path animation. Use Shift+P keys to add the Position animator. Next, I'm going to put the playhead at 0.5 seconds and move the car to its next position. Somewhere around here. To bend this path, hover above it, until you see the arch symbol next to the cursor, then drag it:
Now let's see how it goes. Hold Shift when dragging the playhead for a smoother transition.
The motion path of the car doesn't seem quite right. I can fix this by making the car auto-orient along the path. For that, click this icon next to the Rotate properties. And now let's check it again. Still, I think I wanna rotate it just a little bit more. Looks good enough:
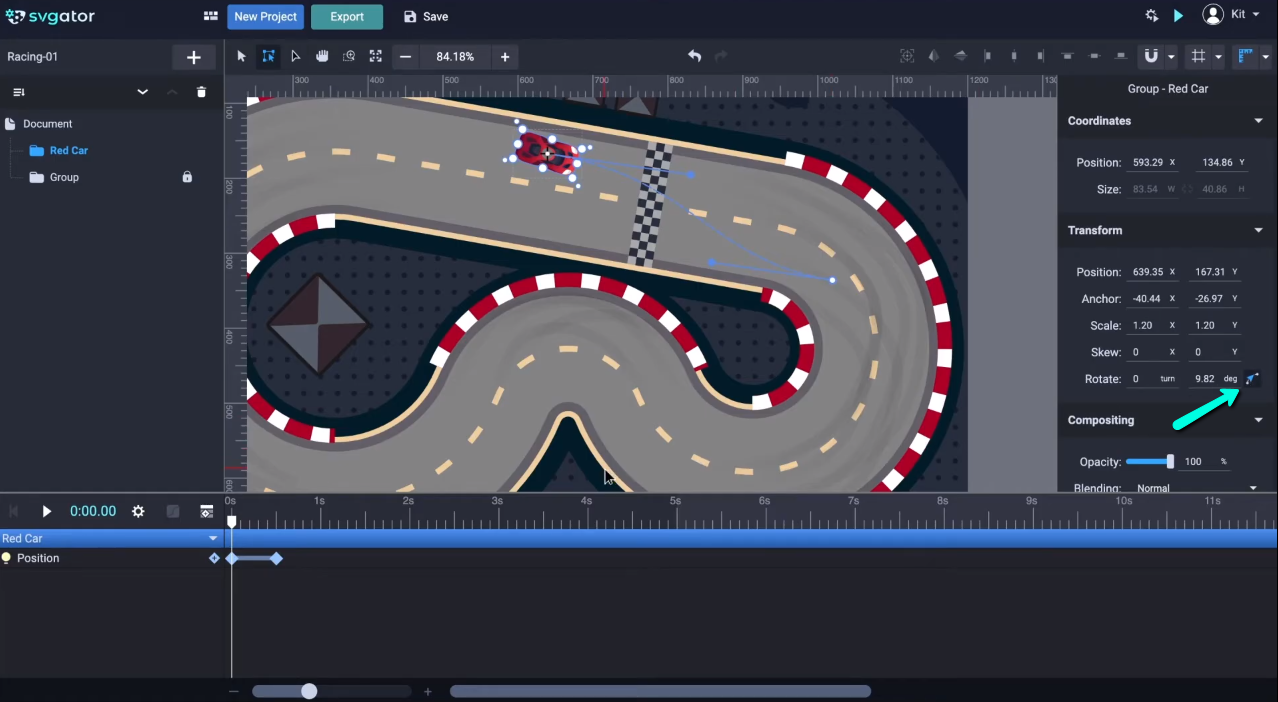
Now we can continue working on the next part of our motion path animation, so I will go ahead and set the next point. I'll place the playhead here, after another second, and now I have to place the car, somewhere after this turn, and adjust the path using the bezier handles. Just like this. I'll try here to make the motion path as smooth as possible. Now let's have a look at it:
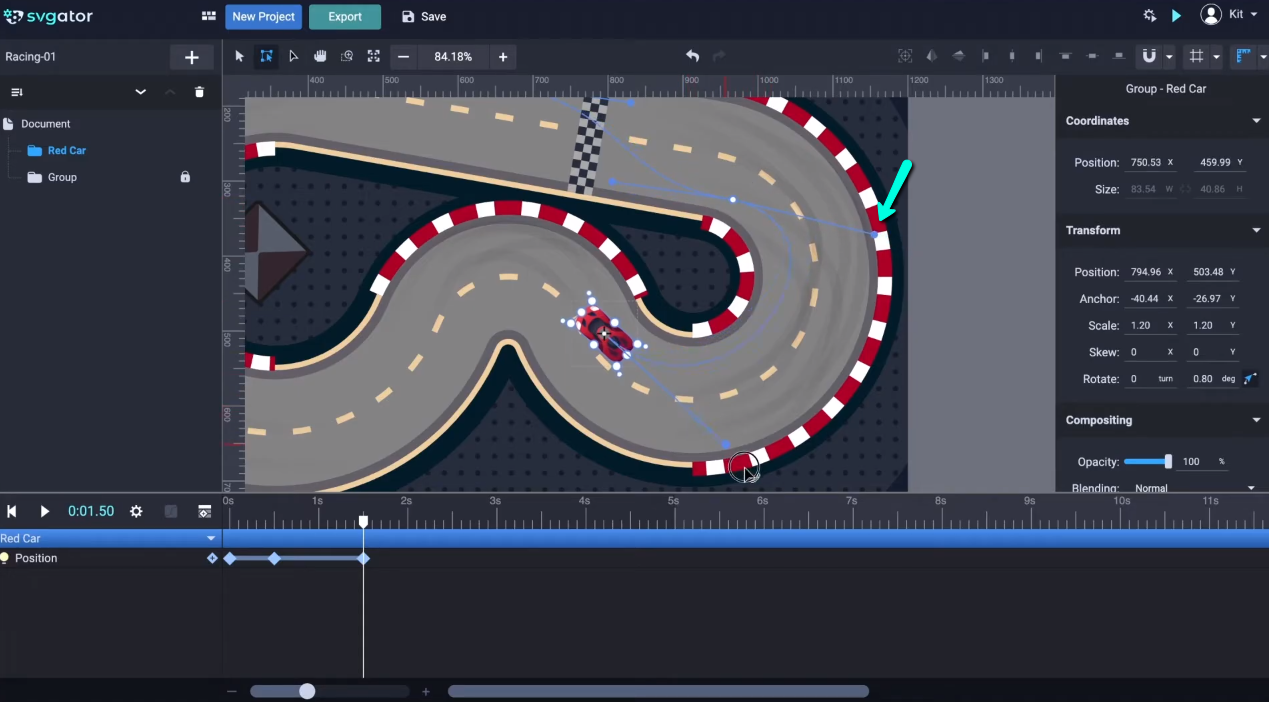
I think the motion looks pretty good so far, but maybe little extra adjustments will be needed later. Let's move on for now. I'll take the playhead to 2.5 seconds and think of the next position of the car. I guess here it will be good, almost in the middle of the last turn of the race track. Carefully adjust the motion path of the car to fit along the track. Grab this handle here and make sure the path won't drive the car off the track. I wanted to go more in the right lane. Now let's see how it goes:
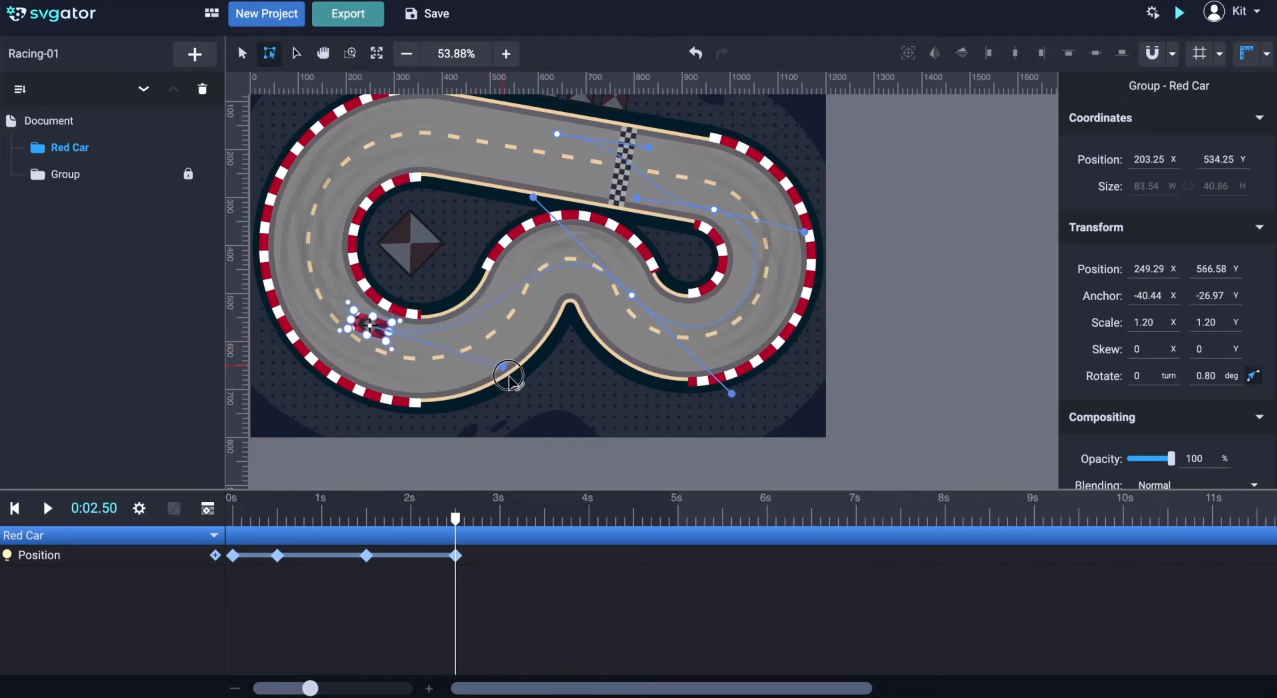
I will place the next keyframe at 3 and a half seconds. Of course, drag the car somewhere towards the end of this last turn. The same thing adjusting the motion path as before, I'd like to keep the car in the right lane for now.
I need to close the loop and bring the car at the same point from where it started, another second further from the last keyframe. Drag the car near to its final position. Adjust the motion path. Let's go back a little bit, so I can grab the point. I have the snappings disabled for this, because otherwise, it will make the process more difficult, as you can see. I'll keep this option disabled. So now I will carefully place the endpoint over the start point:
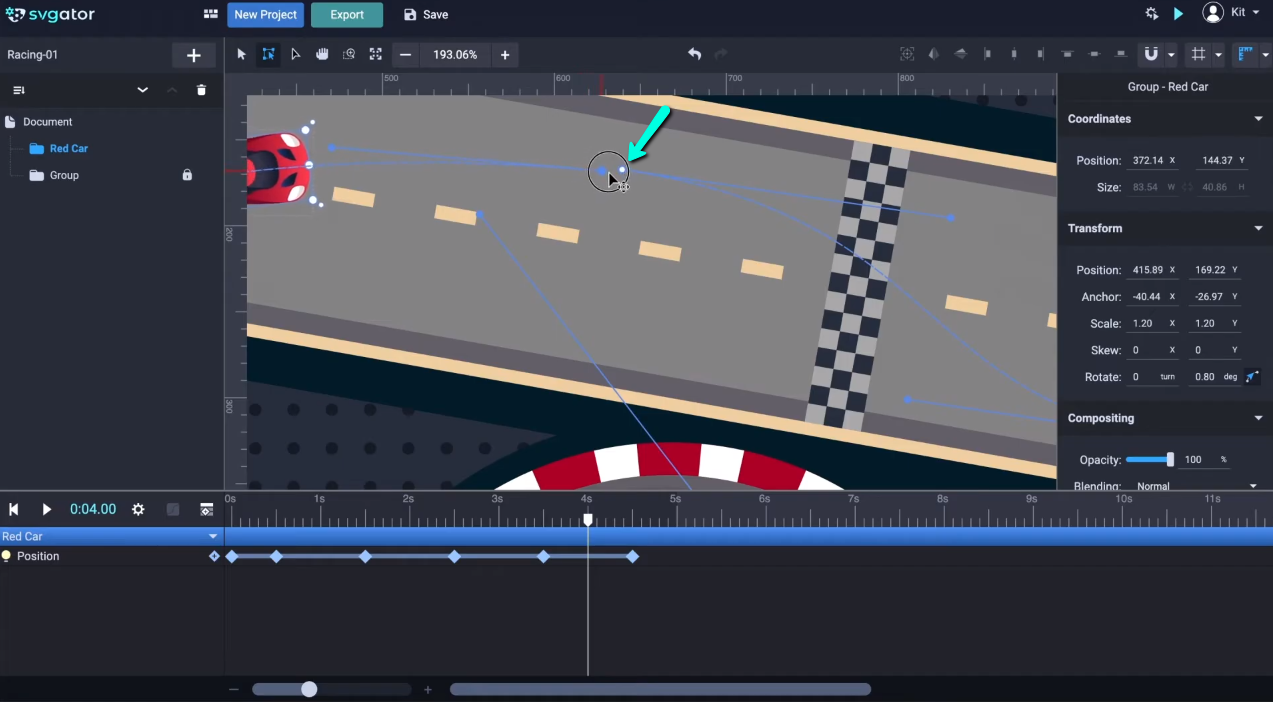
Adjust the motion path so it will look continuous to obtain a good looking loop. Now let's have a quick preview. There seems to be a speed difference in the last turn, so I will have to do a few more adjustments. To speed things up a little, I have to reduce the time between these keyframes.
Let's take a look. It looks like this loop doesn't need to be more than 4 seconds. Therefore I'll go to the timeline settings and set the timeline to 4 seconds. Also, make sure you check the infinite option. I already have it checked:
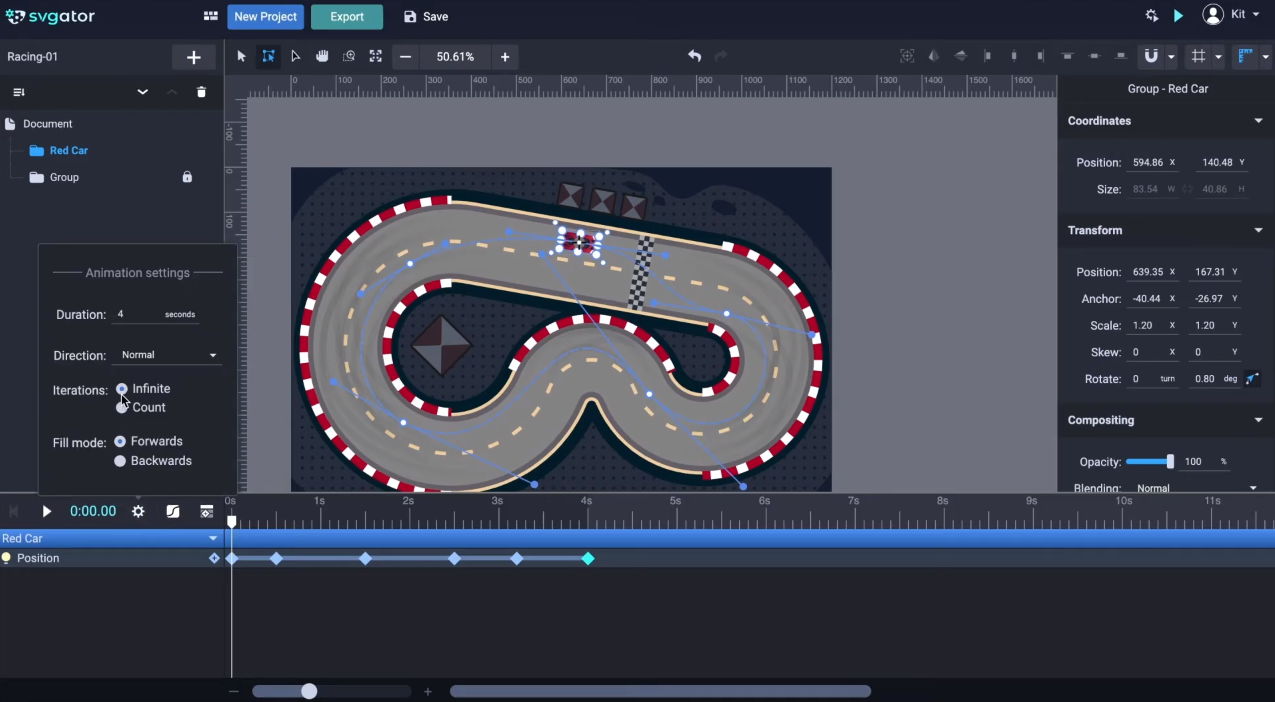
Now let's check the motion path animation using the preview option. Using the preview option will allow us to see the animations settings applied earlier. In this case we can see how the loop looks, but you can also experiment with different animation triggers such as on-click, or on mouseover.
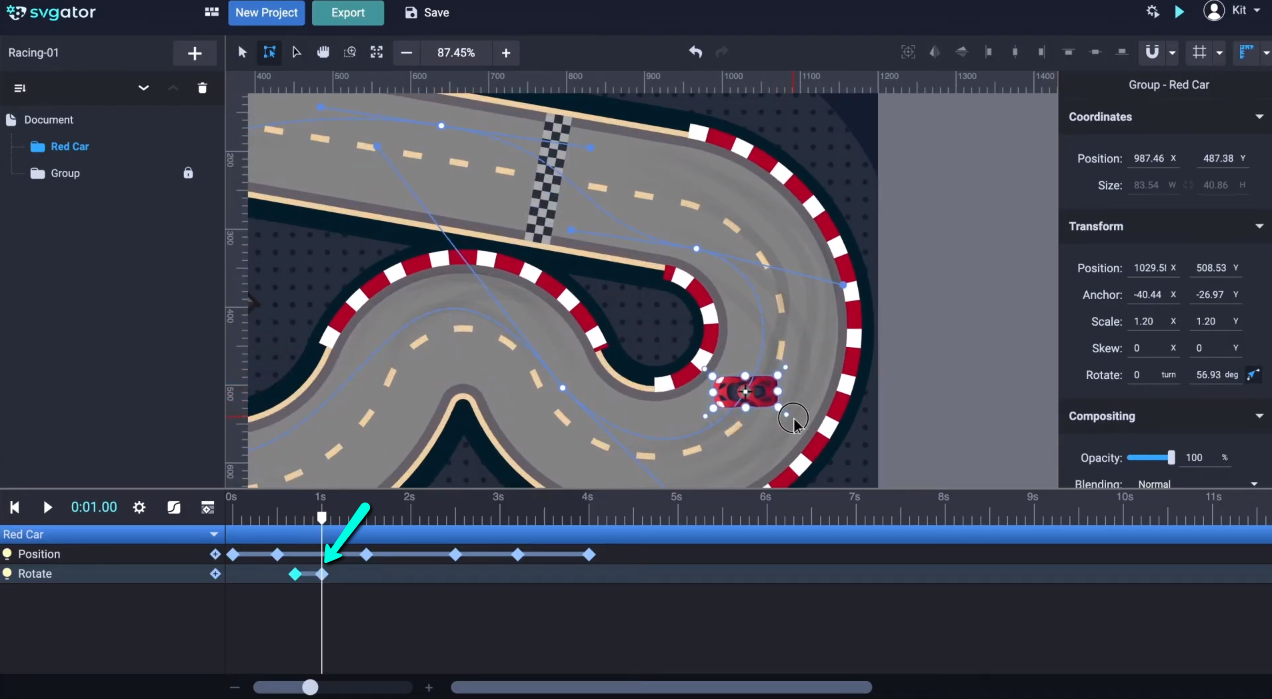
One more thing I'd like to do for this motion path animation is to make it drift on the turns. And for that I need the Rotate animator. Now I need to figure out where the drifting should start. I guess somewhere around here, after entering the turn. And I'll place the first rotation keyframe here, at 0.7 seconds. Now let's see where I should place the second one. Let's try here. Now I'm rotating the car to orient it towards the inside of the turn, and move ahead, a little more forward, and right about here I'll end the drift by rotating the car in the opposite direction, like this:
Now let's keep going. I'll duplicate the last keyframe. Right-click and duplicate. Moving on now towards the last turn of the race track I need to find the spot where I should place the keyframe. From here I want the drifting to start and now I want to see how long it should take. Here, I'll rotate the car a little, and let's check it out. Maybe the drift during the motion path should last a little longer. I'll bring the last keyframe here to 3.5 seconds:
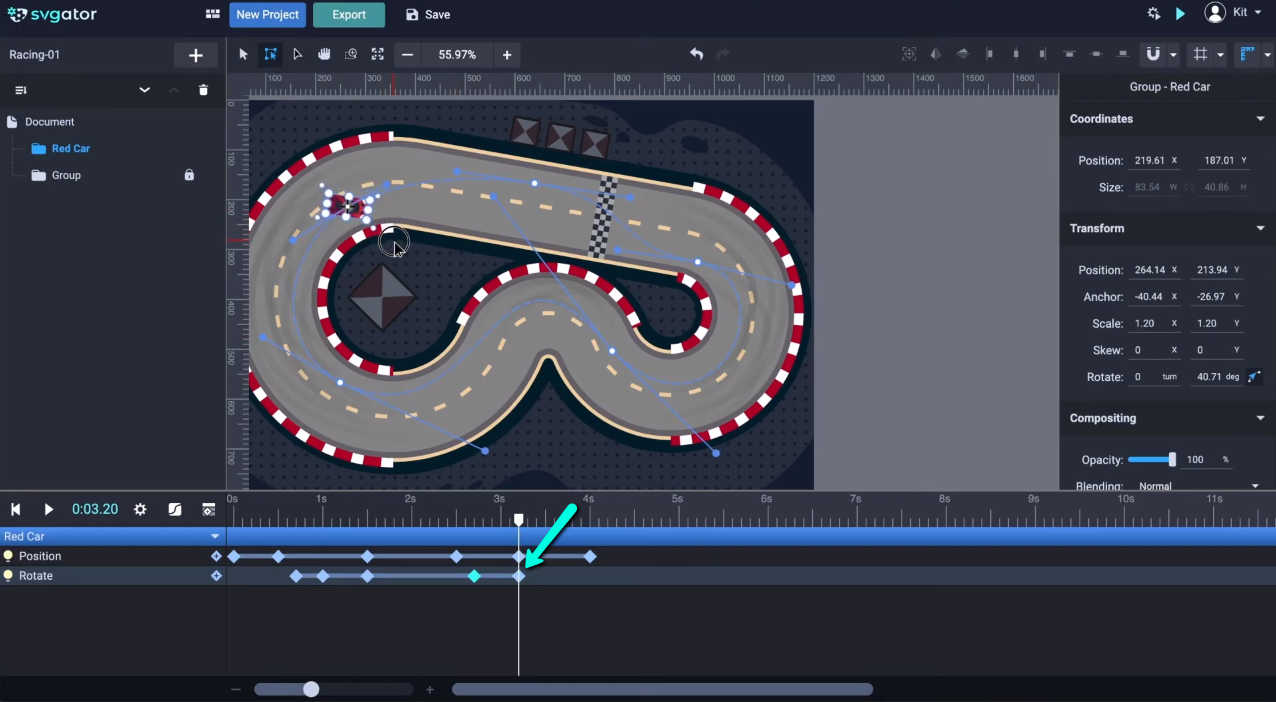
Now in this last portion I want to make the car lose the stability a little bit, so I'll alternate a few rotations clockwise and counterclockwise, and I'll make it to recover its stability right before the finish line. For that, I will duplicate the first keyframe. Let's see the animation now, ok.
Now let's go to the preview to see the actual loop. This is how you can create a motion path. You can animate any element along a custom path using the Position animator and rotate to make it a little more interesting.
I'm now going to add and animate a second car, but if you are here just to learn about the motion path animations, you can stop watching the video here. I'm going to upload another SVG that I've prepared, this blue care. Click Open, and just click on it to add it to the stage. Here it is, and I just have to place it where I wanted to go now. Let's center the origin first. That is important. Apply a scale of 1.2 as did for the red car:
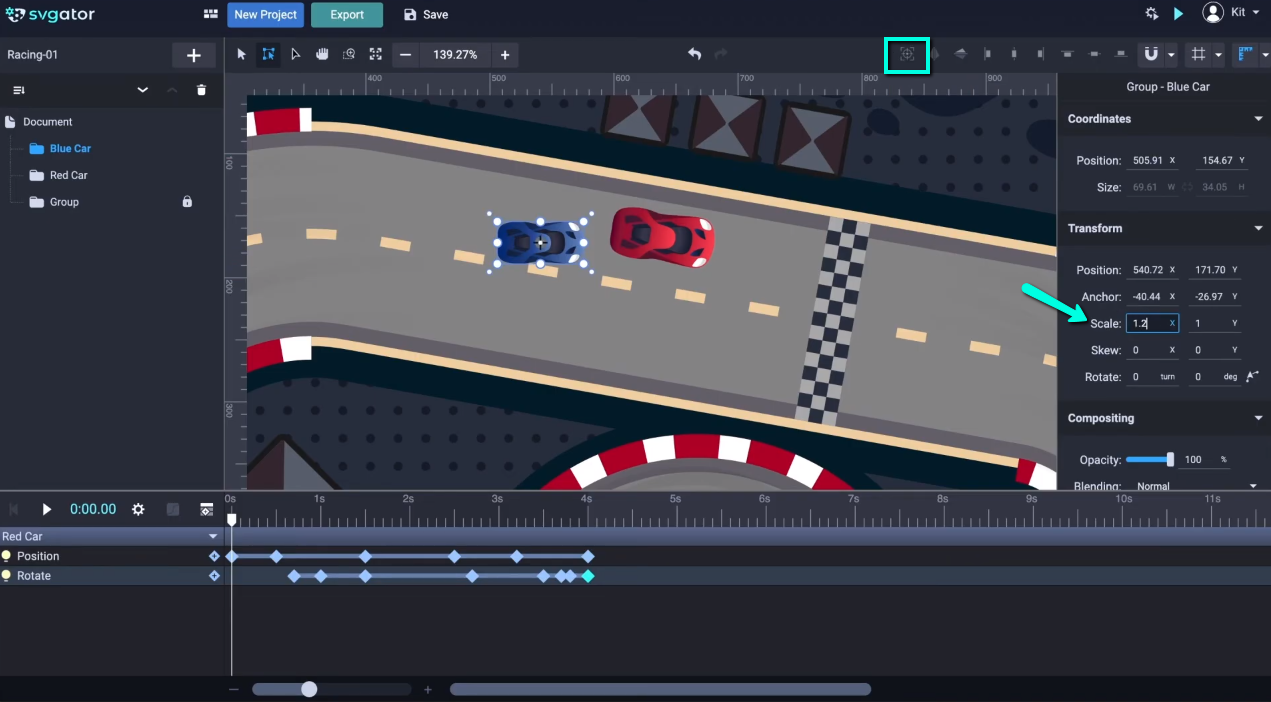
Now let's place it behind the red car. I want to make it racing against the red car, so I must do the same thing over again. Add the Position animator. I'm going to drag the playhead to 0.5 seconds, right where the second position keyframe of the red car is. Now drag the blue car behind, right about here. Also, click on the orient on path icon. I must adjust the rotation a little bit, the path as well. Now let's take a look:
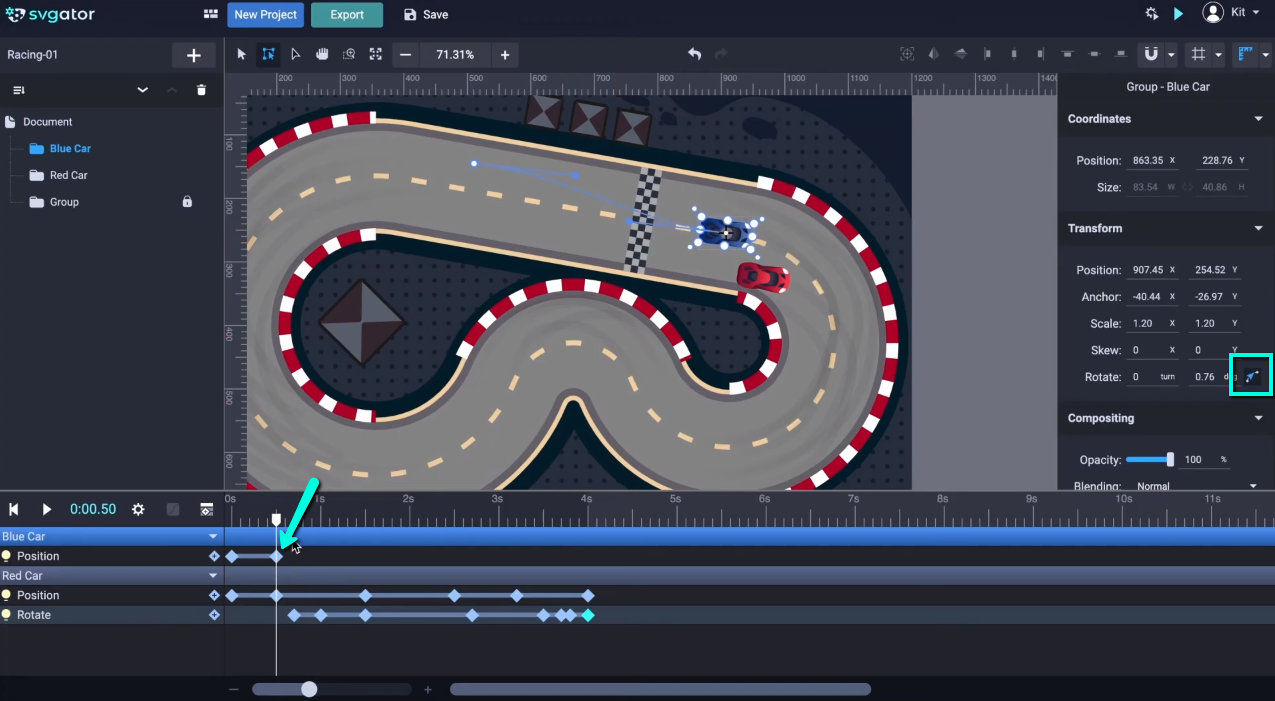
Let's go to the next step. I'm going to drag the playhead to the position of the next keyframe of the red car, I'm trying to keep it synced here. I want to place the blue car behind the red car again. Adjust the path and try to make it smooth as possible. I'll just drag it a little bit over here. Let's check by dragging the playhead back and forward again. I want to make sure there is no collision between the two cars. I can add the rotation for the drifts now while advancing with the position animation. I can select these 2 rotation keyframes from the red car, right-click copy, select the blue car, and paste. The rotation keyframes will be added starting from the position of the playhead. Let's check the drift now, good:

I'll use the copy-paste keys now to copy this third keyframe here as well. Ok let’s move on another second and I make sure to keep it in sync with the first car. Grab the blue car and drag it, and now I'm thinking maybe giving the blue car little advantage here in the race. I'll make it cut through the lane, making the path less bent. Also make sure to keep it on the track. Let's check it now:
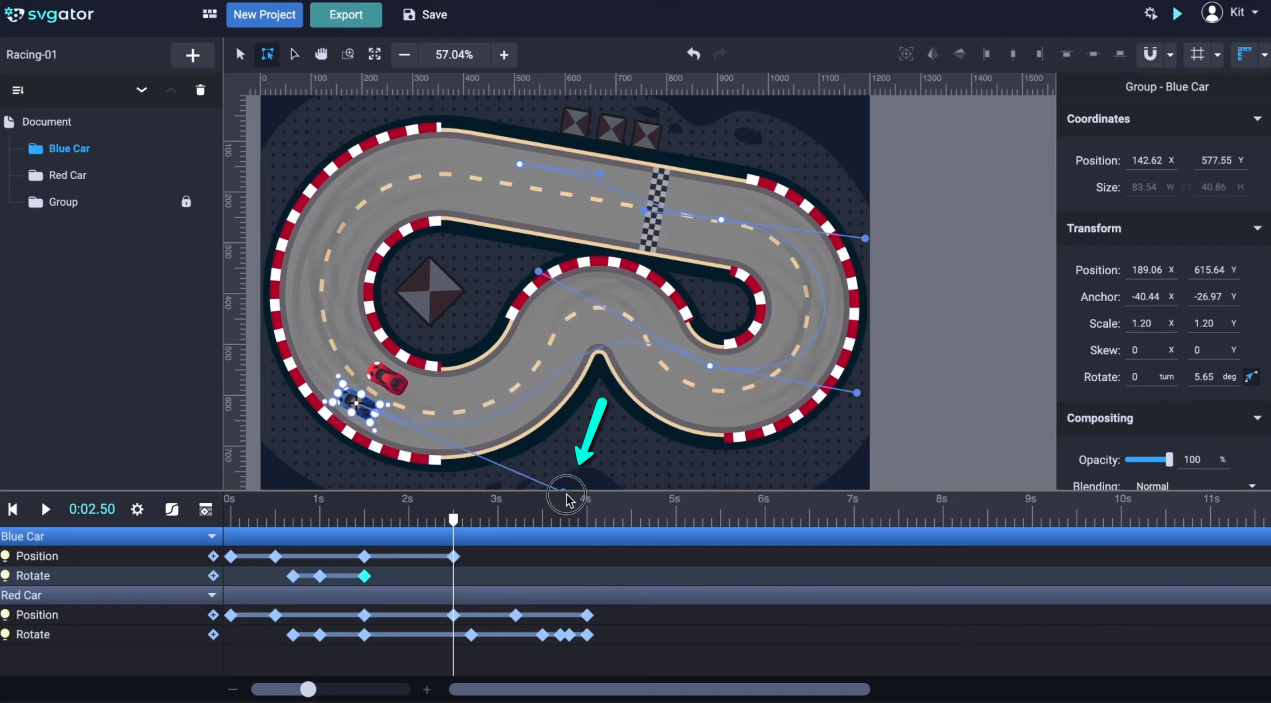
It seems like there's a little collision, so I need to make some more adjustments. Just carefully drag the path, and you can see the position of the car changing while I do it. So here is the moment when the blue car tries to take the lead in the race, and it gets right next to the red car in the left lane. I'll now duplicate the last rotate keyframe at 2.5 seconds. And drag the playhead right here to 3.2 seconds. Place the blue car at the end of the last turn. Adjust the motion path. I want to make sure it keeps the car in the left lane here:
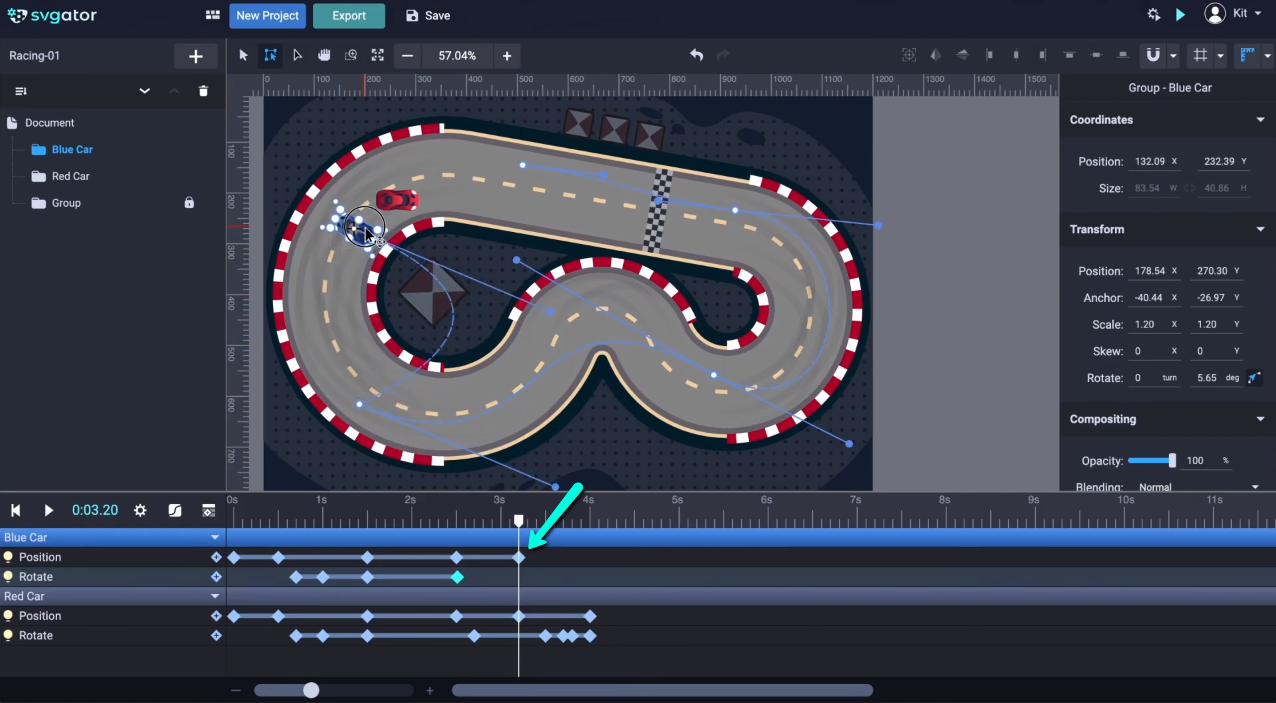
Now copy keyframes and paste above. I'll manually rotate the car to make the drift look more spectacular. We're almost done here. Drag the car and place it over its initial position. Zoom in a little, I'm trying to place it the best as I can over that starting point and do the adjustments here for the path. Let's take a look:
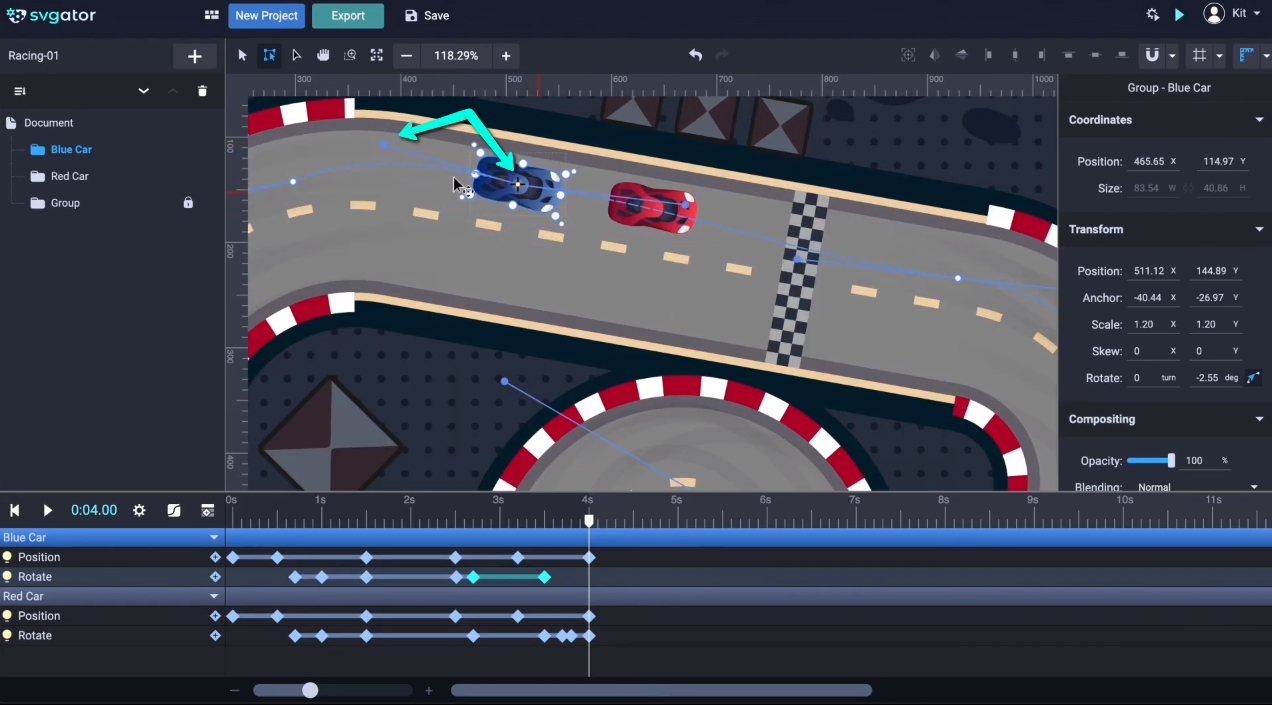
There's another collision here, we can't have that. I guess I have to bring the blue car more to the left edge of the race track. Make sure the endpoint is still over the start point. Let's take a look. The blue car almost runs off the track, but I think it looks even more interesting this way, so I will keep it. Let's preview the entire motion path from start to end.
This is how you animate two cars racing in SVGator using Position and Rotate. I hope you enjoyed this video. Thanks for watching.
Still got questions? Send us an email to contact@svgator.com and we will get back to you as soon as we can.